It is a privilege to be able to share these images and details of the Zoukei-Mura 1/32 Toryu Ki-45 Kai Ko as built by Dean Large and featured in Airfix Modelworld magazine. This impressive large scale kit is available in two versions in Zoiukei-Mura's Super Wings Series, kit SWS No.13 offering the Tei interceptor or Hei/Tei air-to-air ramming variant and kit SWS No.14 offering either the Ko or Hei interceptor variants.


On receipt of kit SWS No.14 Dean was impressed with no less than 25 sprue frames of parts and a 60-page long instruction manual. Having decided against using the optional clear parts for the fuselage, wings, tailplanes and engine nacelles Dean was left with an approximately 400 parts build and elected to complete the kit as the Ko version.


Construction began with the engines, each of 28 parts, and Dean noted an extent of detail provision that would not be visible with the model complete. The tubular mouldings such as pipes, exhausts, pushrods etc., had prominent mould seams and needed cleaning up before assembly. The other engine parts such as the banks of cylinders, carburettors and gearboxes required only minimum clean up. Once cleaned up all the parts fitted with click-together precision. The engine was painted with AK Xtreme Metal Steel followed by a black pastel wash. The carburettors and other ancillaries were finished in Tamiya XF-53 Neutral Gray with details picked out in AK Aluminium. The exhausts were first painted steel and then given a matt coat before successive layers of pastel washes in reds, browns and blacks, etc., to give a rusted and weathered appearance, then fixed with a second matt coat to prevent smudging when handling.


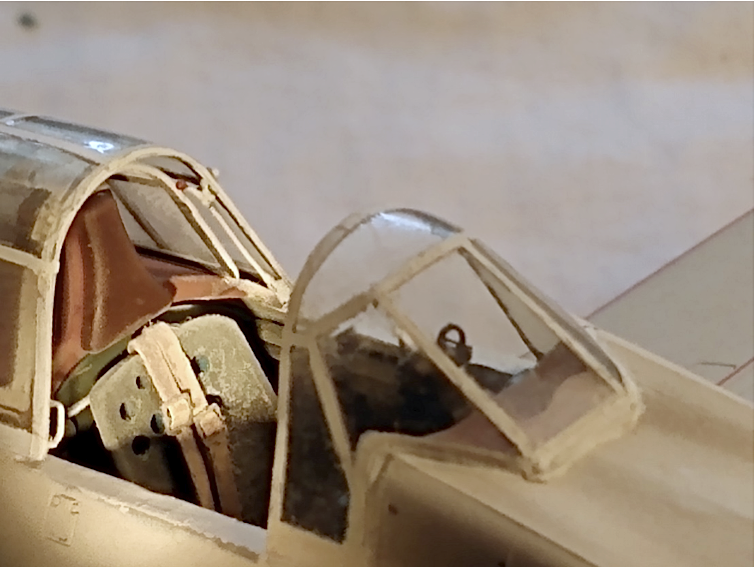
For the very detailed cockpit Dean decided not to follow the instructional construction sequence requiring the cockpit floor to be attached to the single piece main wing spars. That 17” long structure would have made the cockpit assembly rather unwieldy to handle while adding the small details later. Dean decided that sub assemblies would be the best approach, with the whole structure only being brought together at the last minute before insertion into the fuselage. That meant a large number of cockpit parts would remain loose so a number of small plastic containers were used to keep the parts together and prevent losses, duly labelled of course. Dean followed the instructions to paint the interior 'late war khaki' but added Hobby Color H52 Olive Drab to H81 Khaki to achieve a greener effect matching photos. Notwithstanding the ZM instructions an interior colour of dark blue-grey or grey-green would probably be more typical for the Ko. Dean completed the interior with all the parts provided but noted that much of the detail is invisible once the model is completed and that many parts could be omitted to speed assembly without compromising the final result.

There are three methods of presenting the instrument panel; by painting the raised detail on the plastic part, by applying an instruments decal, or by using the clear part. Dean chose the latter and masked off the openings for the dials and readouts, painted the panel black and then added the instrument decal from behind to show through the clear faces. Microscopic masking was needed for that - fortunately the majority of the dials being the same diameters as some of the punches in a miniature punch set allowed tiny discs of masking tape to be punched out for the purpose. More irregularly sized and shaped openings were masked with tiny blobs of Blu-Tak teased into position with the point of a cocktail stick. Switches and other details were then painted on with a fine brush and a steady hand.

There was a similar situation with the twin Ho-103 nose armament, unseen once the nose cone was assembled and if the inspection panels were fitted closed. The nose cone proved slightly too wide in diameter for the fuselage, leaving a step, and the sides of the latter had to be built up with layers of brushed on primer as filler. Dean used the optional transparent nose cone as a sacrificial 'dummy' to sand the fuselage to achieve a perfect match, thereby preserving the surface detail on the solid nose cone.

According to the instructions, the undercarriage assembly needed to be fitted before the top wing halves were added. This seemed to Dean to be inviting their accidental removal later in the build, so he conducted tests to determine whether they could be fitted after the main airframe was assembled. The answer was yes, even after the engine nacelles were fitted, but only if the gear doors were added beforehand as these would not go in afterwards. The undercarriage itself is very sturdy and well braced, with amazing levels of detail up to and including separate brake pipes to add. Curiously the tyres were not moulded to simulate weight on them, so this was done by careful filing.


The wing halves were added by locating the full length wing spar into the recess inside the wing half. This gives the correct dihedral angle automatically, with no warping. The top wing half was then added, and again fit was exact, the complex curves of the wing root fillets simply clicking into place. Their fit was so perfect that it was actually difficult to remove them again without damaging them, so a bead of liquid poly was run around the joints to fix them in position. Ailerons and flaps were added, and showed a similar precision of fit. The tailplanes and the fin also fit perfectly into their recesses too, with no filling necessary. One thing to note is that part of the tailplane and fin is visible through the open tailwheel well as it forms the roof of this structure. This means it has to be painted in the interior colour before assembly, as otherwise bare plastic will be visible and this is not mentioned in the instructions.


Once the main airframe was together, it was time for a coat of Mr Surfacer 1200 grey primer to check that joints were satisfactory with only some tidying up was necessary here and there. The rear cockpit was masked with tape for the primer application, and the front cockpit was masked using the ‘closed’ version of the windscreen and canopy as it was an excellent fit and would not be needed for the completed model. The rear fuselage and outer wings were sprayed in Mr Surfacer Base White primer rather than using the decals provided for the Homeland Defence 'bandages'. The instructions mention that the white wing stripe decals need 3mm trimming from each side before fitting for the option chosen, and when the painted wing stripes were measured to accommodate this it was noticed that the decals for the yellow leading edges would then not meet up with the white stripes as required, so could not be used. That necessitated the yellow areas being painted too, and it was fortunate that this was noticed before the camouflage went on as yellow is notoriously difficult to paint over darker colours.


Mr Color C128 was used for the Imperial Japanese Army grey, and C130 for the dark green reticulated camouflage. These are lacquer paints, requiring thinning with Mr Color Levelling Thinner, and the first stage was to cover the entire airframe with the grey, simulating the aircraft’s appearance as it was delivered from the factory. The green patches were then airbrushed on freehand, without masking, but this approach caused a significant amount of green overspray between the patches. Whilst other builders have seemed content to leave this be, Dean felt that it was overscale and reloaded the airbrush and to clean up the grey areas. A glosscoat of Tamiya X-22 thinned with Mr Color Levelling Thinner was then applied to ready the airframe for the decals.


Weathering was added with a medium grey chalk pastel wash on the lighter undersides and the white stripes, with a black wash on the darker green areas above. A very thin mixture of black and brown was then applied in subtle streaks at random on the underside to simulate grime and provide some variation to the large area of grey. A coat of matt varnish sealed everything, followed by a little grubbying up around the exhausts and wing root walk areas using powdered chalk pastels. Weathering was kept deliberately light, as a ‘used-but-serviceable’ look was intended.
With very special thanks to Dean for sharing his images and details of the build here.
Image credits: All photos © 2020 Dean Large