Sunday 31 December 2017

John Haas' 1/48 Ki-78 Project ~ Part Two


In the second part of the 1/48 scale Ki-78 scratchbuilding project, John has assembled the fuselage (above) with some difficulty due to the thin and flimsy edges of the vacformed parts, requiring a lot of additional support using thin strips on the inner sides. These can be seen in the wheel wells (below). John then added the fin and rudder, crafted from thick plastic sheet.


Construction of the wings proceeded quite smoothly. John made four wing spars and after some careful filing and sanding the two halves matched each other. The trickiest stage of assembly was to mate the wings to the fuselage and John followed a construction method often used with mainstream kits of fixing the lower wing first and then adding each top wing separately.


Next the distinctive fuselage radiators were crafted using the process Frank Mitchell calls "heat and smash". John made a plastic master form and heated plastic sheet on the electric oven to produce two radiators.  


And there we are. The model at this stage begins to look like a Ki-78 but there is still a lot of work to do! As the last hours of 2017 tick away the project will be continued in Part Three next year . . . 

Thanks again to John for sharing these inspiring images and notes. And best wishes for 2018 to everyone. 

Image credits: All photos © 2017 John Haas


Friday 29 December 2017

John Haas' 1/48 Ki-78 Project ~ Part One


Prolific and expert scratchbuilder John Haas kindly shares his 1/48 scale Ki-78 vac-forming project with Aviation of Japan. For a long time John had the idea of using the vacuform process for scratch- build models. For him Dr Frank Mitchell showed him the way that it could be done. First he built a vacuforming box, then to keep everything as simple as possible for the first time he chose the Kawasaki Ki-78. And of course it was to be in his favourite scale of 1/48th. Simple, small and clean lines, not too complicated, or so he thought!


John started with the fuselage and wing made in wood, this time in two pieces, fastened together with screws.


After completing the parts he treated the surfaces with layers of primer.


Then came the big moment of vacuforming the parts from thin plastic sheet of 0.5 mm gauge.


After two attempts he had some useable parts with which to begin construction. John was glad that he had some previous experience of building a few vacuformed models, because he found that this project was no piece of cake and frankly was plain difficult!  But in the end it all worked out well.


With special thanks to John for sharing these images of construction and notes on his project with Aviation of Japan.

Image credits: Heading photo via John Haas; all construction images © 2017 John Haas.

Thursday 28 December 2017

Francesco Borraccino's 1/72 Ki-43-I


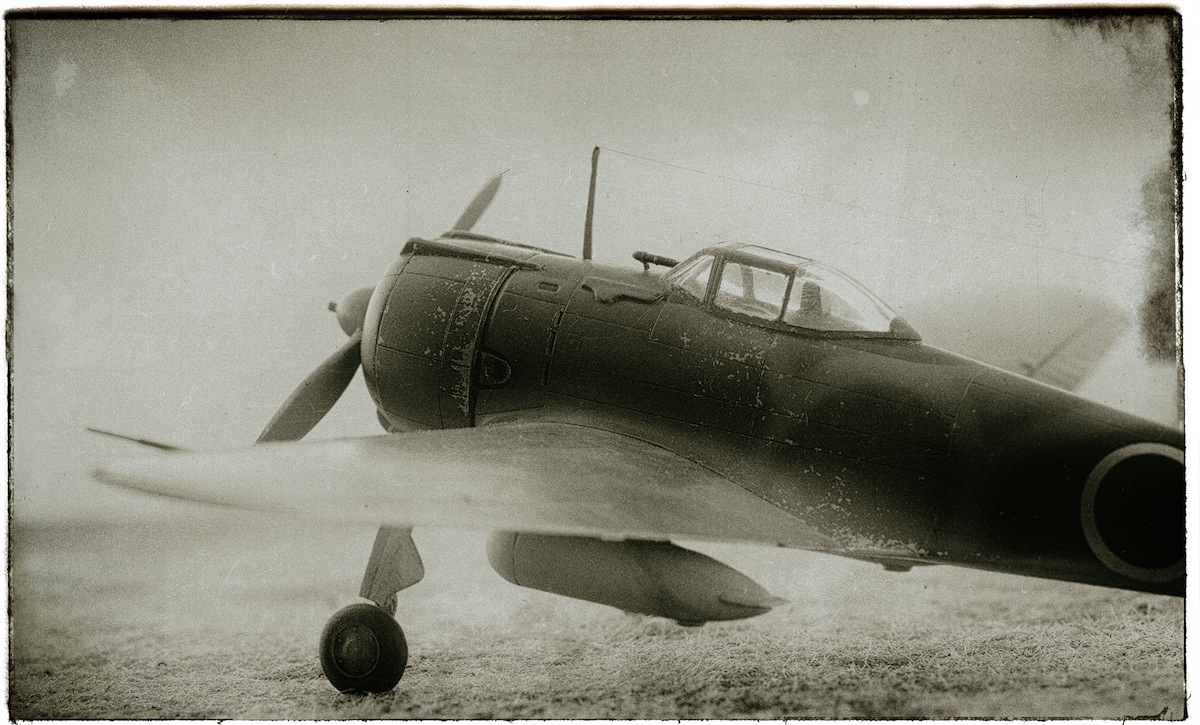
Francesco Borraccino has very kindly shared these images of his 1/72 Ki-43-I model in 11th Sentai markings crafted from the Fujimi kit. 


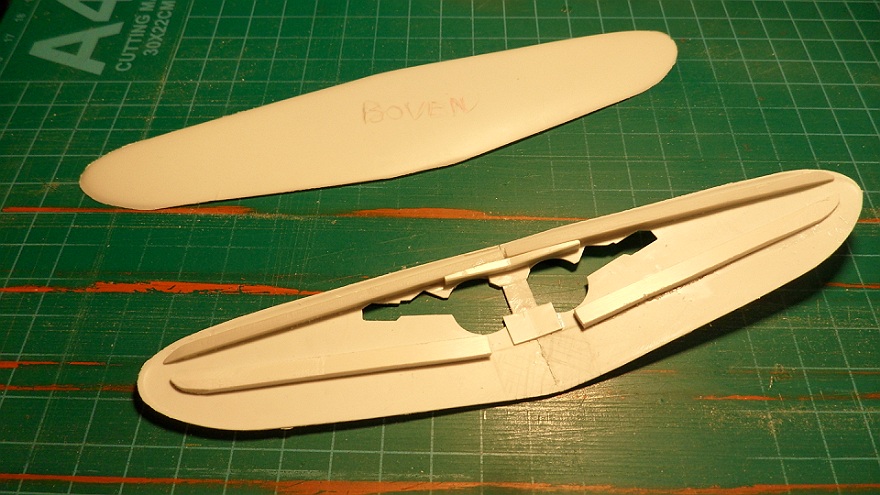
Although the Fujimi kit dates from 1994 (is it really 23 years?! Seems like yesterday!)  Francesco feels that it captures the shape of the early Hayabusa quite well. But he says that he is not a "rivet counter" and has not compared the kit against plans! The level of detail is good but he enhanced the cockpit using plastic strip and copper/lead wire. Seat belts were added using Tamiya tape with buckles fashioned from copper wire.


The build was straightforward until the kit canopy came to be attached which Francesco described as a nightmare! He found no clear indication or marks for positioning it and a poor fit.  


He finished the model to represent an aircraft of Hiko Dai 11 Sentai, replicating the scheme on the well known restored example. The green was matched to colour # 21 midori iro from the IJA KoKaku 39 standard, which he mixed using Tamiya XF-26 (Deep Green) and XF-65 (Field Grey). The unusual brown camouflage pattern was matched to # 33 kaki-iro (persimmon colour) with a mix of Tamiya XF-64 (Red Brown), XF-59 (Desert Yellow), XF-7 (Flat Red) and Gunze H-413 (RLM 04 Yellow). The undersurfaces were finished as natural metal. The wheel wells and inner faces of the undercarriage doors were also finished in aluminium at the time these photos were taken but Francesco subsequently re-painted them in the dark blue grey primer colour. The wing leading edge IFF strips were painted with a mix of Tamiya XF-3 (Flat Yellow) and XF-7 (Flat Red).


The spinner appears dark in tone in photos so Francesco interpreted it as the airframe dark green, following a profile in the FAOTW monograph*, with the prop blades in aluminium and their rear faces painted brown. Early production Ki-43-I had an aluminium painted spinner with polished metal prop blades and red warning stripes but later production aircraft had spinners and prop blades in overall dark brown with yellow warning stropes. The anti-glare panel was painted black. The drop tanks were painted blue-grey with a mix of Tamiya XF-23 (Light Blue) and XF-19 (Sky Grey).   


Francesco felt that the kit's hinomaru decals were too bright so he replaced them with some Techmod decals from a Kagero publication. These proved to be very fragile and not opaque so he discarded them and resorted to the decals from an old Hasegawa Ki-43 kit which he found to be satisfactory (a set of generic Army hinomaru with good opaque red is still needed). The Sentai insignia and senchi hiyoshiki fuselage band were painted on using a custom made mask.  


With special thanks to Francesco for sharing these images of his excellent model with Aviation of Japan. 

* Famous Airplanes of the World # 65 Army Type 1 Fighter Hayabusa (Bunrindo Co., Ltd. July 1997). Gakken # 52 (2005) has a profile of the same aircraft with dark brown spinner and prop blades - yer pays yer money . . . ! 

Sunday 24 December 2017

Seasons Greetings


With Very Best Wishes to all friendly Aviation of Japan readers for the Christmas Season and New Year. 

Image credit: Tokyo (Santa in the Snow) 1950 by Kawase Hasui 1883-1957


Thursday 7 December 2017

Aviation Prints by Ronnie Olsthoorn


Those who appreciate the superb aviation art of Ronnie Olsthoorn might like to know that selected prints of his work are available from Aviation Graphic in Italy, including new edition prints of his beautiful Ki-61 art for Osprey. These prints would enhance the walls of any den or man cave so their gift potential is obvious and for those whose stashes have already reached finger-wagging proportions their arrival in Santa's sack will avoid having to smuggle them into the house. Beautifully presented as shown below, with remarques and highlighted emblematic details, all the prints are visually striking. I have the Ki-44 Tojo print and can vouch for the quality of paper, colour reproduction and printing - whilst the size permits an appreciation of the exquisite surface detail not visible in the smaller Osprey profiles.

Ronnie was born in the Netherlands and has been drawing aircraft for as long as he could hold a pencil. Swapping brushes and paint for a mouse and keyboard in 1996, he soon discovered that 3D illustration was the perfect mix of drawing, painting, photography and scale modelling - all things he loved doing at that point. After graduating in aeronautical engineering Ronnie moved into the computer games business and refined his self-taught 3D skills. He has been at the forefront of digital 3D aviation illustration ever since. His work has been featured in the books of many leading aviation publishers, adorns walls in the homes of WW2 veteran pilots and won awards on prestigious 3D art websites, which usually tend to avoid technical subjects. He has also worked on air crash reconstructions, which were featured in a few lawsuits in the US. Having lived and worked in the UK for the better part of a decade, Ronnie returned to the Netherlands to work as a lead artist with Holland's leading product visualisation studio for a couple of years. More recently Ronnie has made the move to freelancing again and among other things he is now producing more aviation art, 3D models for TV documentaries, and box art for games and model kits. Ronnie (Skyraider3D) is also available for private commissions. He can be contacted through his own website at http://www.aviationart.aero


It has been my great privilege to collaborate with Ronnie on the artwork for three Osprey Aircraft of the Aces Japanese subjects - Ki-44 'Tojo', Ki-27 'Nate' and Ki-61/Ki-100 'Tony' - and he is currently working on new profiles for Volume One of Osprey's Zero Aces (1940-42). I know how exacting and meticulous Ronnie is when approaching the structural integrity of the aircraft depicted and the interpretation of colour schemes from photographs and documentation. Thanks to Ronnie and his sharp eye for details several pitfalls have been avoided and one or two myths busted. Any rare errors of detail are invariably my responsibility!    

Image credits:- All © 2017 Ronnie Olsthoorn via AviationGraphic.com