Showing posts sorted by relevance for query trainer orange). Sort by date Show all posts

Sunday, 26 February 2012

IJN Trainers and Prototypes - Orange or Yellow?


Tricky one this. When does orange become yellow or yellow become orange? The IJN colour specified for training and experimental aircraft in Air HQ Directive 8777 of 29th December 1938 (Renshu-ki Kitai Gaimen Toshoku ni kasuru ken - External Airframe Color for Trainers) was described as tou ou shoku (橙黄色 - orange yellow colour). This can also be expressed as ou tou shoku (黄橙色 - yellow orange colour) - an insignificant semantic difference perhaps. But a veteran quoted by Koruso-san in his article 'The Color of Zero Trainers' describes the colour as “reddish orange” with no mention of yellow - although I do not know what exact Japanese term he used for this.

On 15th September 1942 the Army and Navy Central Agreement (Riku-kaigun Chuo Kyotei) specified that “Training and experimental aircraft should be painted in yellow wherever conditions permit”. The term used for "yellow" was ou shoku (黄色 literally yellow colour) but whether this represented any actual change in the colour to compromise with more yellowish paint colours used on Army trainers is unknown. The evidence suggests that the problem of orange vs yellow perception extended to Army trainers too. To many modellers it seems that the distinction between IJN and JAAF colours remains obscure - they are all too often seen simply as "Japanese colours" and many "consensus conventions" (or "chinwags") are applied. The September 1942 specification remained in effect until a directive on 3rd July 1943 which required that the upper surfaces of all aircraft were to be camouflaged (another story).  

C2 is close to Munsell 7.5 YR 7/14 and in Methuen terms close to 5B8 (but a little brighter). That is categorised by Methuen simply as “orange” but many people, comparing it to a more reddish orange might describe it as “orange yellow” or even “deep yellow”.  This difficulty in visualisation extends to Japanese aircraft kits where there is a similar inconsistency in the degree of red or yellow perceived in the orange. For example, Fujimi’s B7A1 prototype describes the paint colour to be used as GSI Creos (Gunze) H24 “orange yellow” - オレンジイェロー  (oranjikaiero) or 黄橙 (ou tou - orange yellow)  plus H3 “red” (without stating how much red). It is molded in an orange plastic close to Methuen 6A8 (“dark or deep orange”) but it is still a slightly yellower orange than the plastic used for the same company’s D4Y3 prototype. That is suggested to be painted using just H14 orange (オレンジ or  橙). Even so, neither is as reddish as Methuen 7A8 (“reddish orange”), although the difference is subtle indeed.

The Arii (ex-LS) K5Y1, the archetypal “Aka-tombo” biplane trainer, is, as one might expect. molded in a plastic colour much closer to Methuen 7A8 but the instructions suggest painting it with GSI Creos (Gunze) H14/59 Orange (オレンジ) with no additional red. The various paint mixes, although not tried, imply quite a reddish orange rather than an orange yellow and might explain why so many models end up looking so reddish.

Compare Munsell 7.5 YR 7/14 (C2), similar to FS 13432 (FS category "yellow"), with the closest RAL values below (one of which has a Revell paint equivalent) and to RAL's pure orange (also with a Revell paint equivalent). Many modellers seem to tend more towards RAL 2004 type colours than 1037 or 1028 in their visualisation and that is often consistent with Japanese box art and other images. The constituent pigments of FS 13432 are fairly straightforward - titanium dioxide (white), molybdate orange (red shade), chrome yellow medium (red shade) and carbon black - but not a pure yellow.


Documentation reveals that C1, similar to FS 22544 (FS category "orange"), was intended to be used as a "hazard" colour, for example for propeller warning stripes, etc. FS 22544 is not an "easy" hue as its constituent pigments are both complex and subtle - titanium dioxide (white), benzimidazolone yellow, perylene vermilion, quinacridone magenta, chrome yellow (red shade) and carbon black (blue shade) all combining to give it that slightly pinkish appearance. 

What to do about it?  Well, I got into deep orange trouble at one specialist forum when I attempted to draw distinctions between the colour descriptions orange-yellow and orange, never mind reddish orange, but the available artifact and colour photographic references point to colours of similar appearance to the Kariki 117 'C' series chips - which incidentally are grouped generically as yellow (黄色 - ki iro) and which I would describe as strong yellows or perhaps orange yellows. But this is very much about personal perception rather than measured paint, even when it comes to the memories of veterans and one man's yellow might be another man's orange  - and vice versa. To me (and to Methuen) orange per se is something more like RAL 2004. Although C1 is similar to FS 22544 which is categorised as "orange" in FS 595B an examination of the deck will reveal that it something of a hybrid, being grouped with predominantly yellow colours, whereas the predominantly "orange" colours on page 2 are quite different in appearance. 

Post blog note:- I do like originality, so please check out this very informative and timely blog at Arawasi on exactly the same subject (!). 

Image credits: rendered colour chips © 2012 Straggler


Thursday, 23 April 2020

Jim Anderson's 1/72 Willow in Sea Boots


Jim Anderson has kindly shared another collection of images and build notes, this time for his 1/72 LS model of the Yokosuka K5Y2 'Willow' trainer in floatplane configuration. This venerable kit was first released in 1973 in both wheeled and floatplane versions and is still intermittently available from Arii. Over to Jim then:-


"Firstly, let me say 'thank you' to Nick and the Aviation of Japan audience for all of the encouraging comments I’ve received in response to my previous postings.  I started this 1/72 LS Yokosuka K5Y2 ‘Willow’ with floats in August 2010 with the build lasting about 3 weeks.  For a vintage model it was nicely molded, being about to 1970s Airfix or Hasegawa quality.  The box art was very colorful and the surprise was inside as I laid eyes on the shockingly brilliant orange plastic!  


"There were no issues with the kit although some might consider replacing the kit supplied windscreens, which I chose not to  The only scratch building being two simple instrument panels and two pilot seats.  Attaching the upper wing to the ‘N’ struts went well.  I used the kit supplied decals which by that time had to be well over 20 years old but were in remarkably good shape. 


"Painting was as follows: the interior from a 50/50 mix of 'old school' Pactra M-7 Artillery Olive (FS 34088) and Pactra XF-19 Flat Battleship Gray - fine. Now to priming in preparation for the color coat.  I airbrushed everything with a light coat of Testors Flat White but that was not enough.  In hindsight it really needed another coat of opaque light gray as the glaring orange plastic was too much for my casual attempt to hide it.  


"I figured it was  going to be orange anyway – famous last thoughts.   The rudder and vertical stabilizer were painted with Testors 1/4 oz. Red 1103.  The overall color is 60% Model Masters Chrome Yellow FS 13538 with 40% (approximate) Pactra Insignia Orange X-13.  I think that using a regular yellow would have been a better choice than the chromate version I used, as I was never satisfied by the way it looked.  The upper pontoon struts were painted Humbrol HF1 Khaki, the engine cowling was Humbrol Matt Black #33 and the cockpit coaming was Model Master Leather. 


"The decals and rigging were applied next then a diluted coat of Testors Dullcote Lacquer was applied to the model to complete the project.  The combination of pontoons on a biplane can be vexing to a modeler, but with this kit proved not to be the case.  I’d suggest 'Willow' with floats to anyone wanting to 'have a go' at one."

Jim Anderson


'Willow' was the Imperial Japanese Navy's Type 93 Intermediate Trainer, popularly known as 'Akatonbo' (赤蜻蛉 - red dragonfly) from its orange and red plumage, the design originating in 1932 as a joint project to improve on the Type 91 trainer by Kawanishi and the First Naval Air Technical Arsenal at Yokosuka. The wheeled version was designated K5Y1 and the floatplane version K5Y2. The K5Y2 type was produced at five different aircraft factories with production stretching from 1933 at Kawanishi Kokuki K.K. to 1945 at Fuji Hikoki K.K. and Nippon Hikoki K.K. The best English language reference to this long serving and iconic biplane is undoubtedly the superb and highly recommended Arawasi Eagle Eye Series No.2 monograph which includes a wealth of detailed information, plans, photographs, inspiring colour profiles and a translation of the Fuji company's painting specifications.


In addition to the LS kit there have been more recent kits of 'Willow' in 1/72 scale from Valom and AZ Model. There is also a classic 1/48 scale kit of the K5Y1 wheeled version released by Otaki in 1972 and subsequently available under the Arii label. 1/32 scale kits of the K5Y1 and K5Y2 were released by Nitto Kagaku in the same year as the LS kit. The Nitto Kagaku kits were also issued by Entex Industries and from 1991 were issued by Doyusha and are still available under that label.  The 1/32 scale 'Willow' floatplane was featured here in November 2010.  


Image credit: All model photos © 2020 Jim Anderson; LS Box art via Scale Mates

Saturday, 7 March 2020

Two-Seat Ohka in 1/48 scale


Continuing the Ohka theme, Dan Salamone has very kindly shared his in-box review of the newly released Brengun kit (BRP48005) of the two-seat trainer Ohka MXY7-K1 Kai in 1/48 scale. In Dan's own words then:

"I was excited when Brengun announced a 1/48 two seat Ohka trainer in the fall of 2019, and my copy of the model, and optional detail parts arrived this week. The model comes in a sturdy, end opening cardboard box, and contains 3 sprues of injection molded parts, a small decal sheet, and a resin tailwheel. Simple instructions come on a two-sided sheet. The panel lines are recessed, and are very similar to recent Airfix kits, the detail on the fuselage and wings being very acceptable.


"The weakest aspect of the parts is the overly thick (injection moulded) seats. This issue is addressed on the optional photo etched sheet, which also contains clear acetate instrument panels to complement the metal parts. These parts are superb and will add a great deal of depth to the detail. In addition Brengun offers vacform canopies (you receive 2 full sets of front and rear canopies), and a masking set that can be used on either the kit's standard injection molded canopies, or the vacform set. You'll want to open the vac form canopies, to reveal all the detail of the twin cockpits.

 
"Brengun will have you paint the model dark green over grey-green. There are not many images of the 2 airframes that were completed, and the surviving example is painted in two blue shades, which were applied post war. That said, in some recent images of the airframe, you can see what appears to be IJN trainer orange under the blue paint. When I build mine, I will probably opt for the orange over grey-green and pale blue scheme of the single seat Ohka trainer.


"This kit comes highly recommended, and will look wonderful sitting next to it's single seat sibling from Fine Molds. I bought mine from HLJ, since nobody seems to distribute Brengun products in the U.S."


With special thanks to Dan for this in-box review. Fine Molds offers 1/48 kits of the single-seat Ohka in both powered and unpowered versions, whilst Brengun also offers a 1/48 kit of the Ohka Model 22 and similar Ohka family kits in 1/72 scale. 

Brengun Ohka Model 22

Image credit: All photographs © 2020 Dan Salamone; Box art, instructions, kit sprues and optional sets as shown © 2020 Brengun


Wednesday, 25 November 2020

Jason Brash's New Command Recce Trio in 1/72

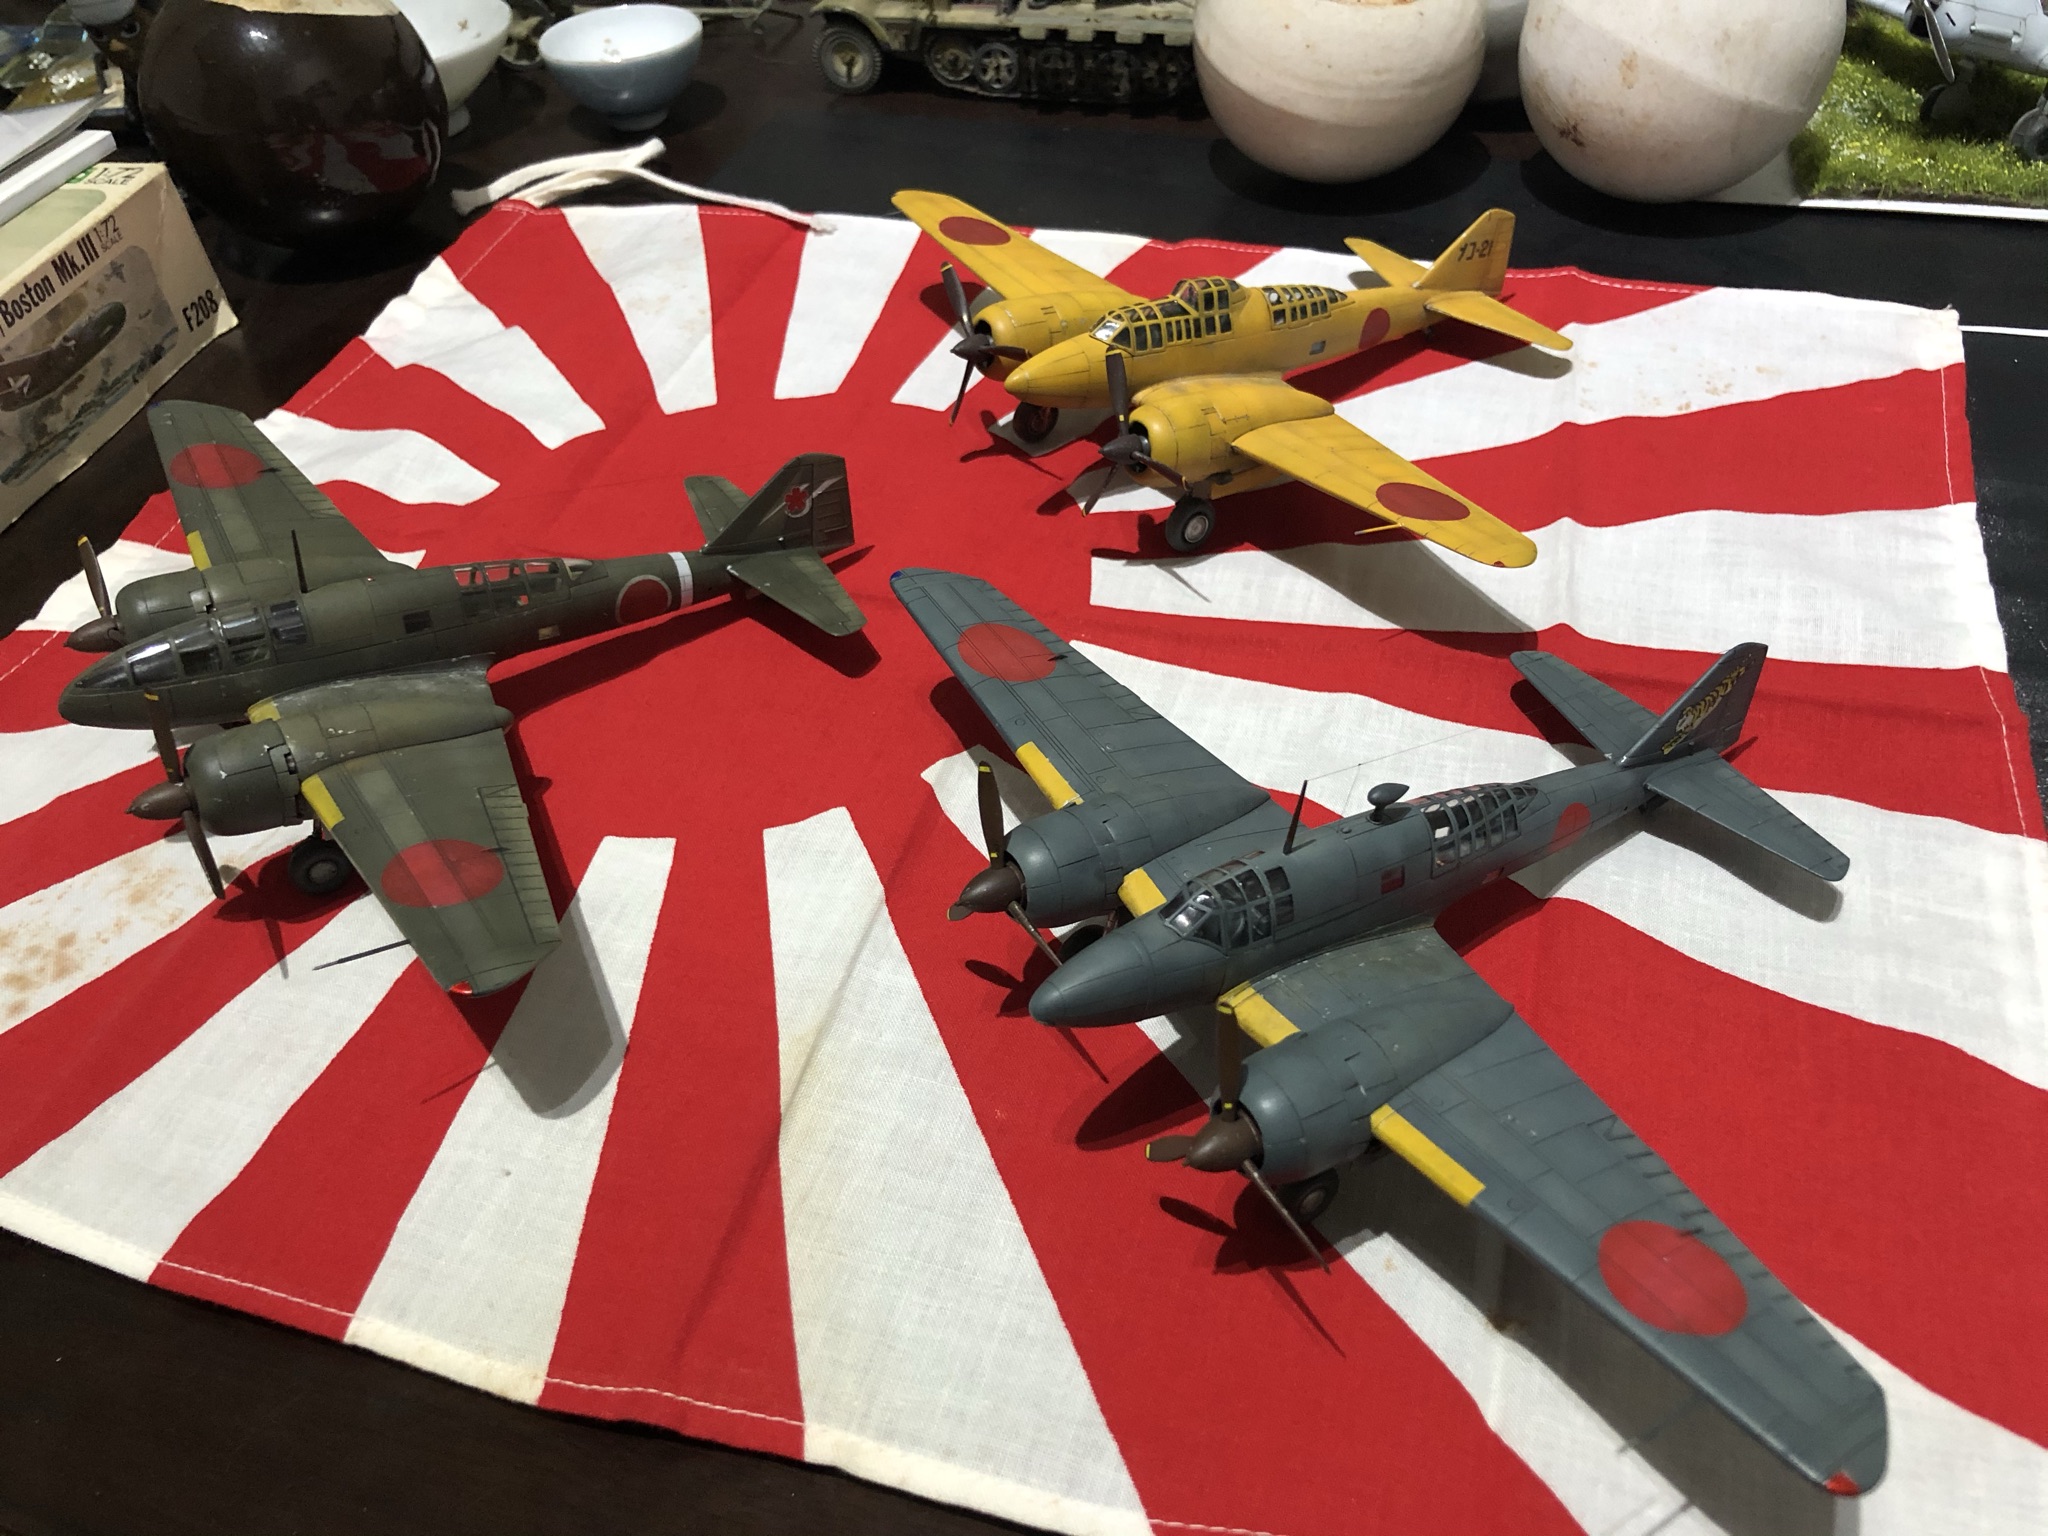
Jason Brash has kindly shared images and details of another of his excellent Japanese twins projects - this time a trio of Mitsubishi Ki-46 'Dinah' models in 1/72 scale. The svelte Ki-46 or Type 100 Command Reconnaissance plane was popularly known as the New Command Recce (Shin Shi-tei 新司偵). In Jason's own words then:-

'For my next project I decided on a dual build, which turned into a triple build, of the Hasegawa Ki-46-II & III and an LS (since re-released by Arii/Microace) -II-Kai. Hasegawa make a fantastic looking Ki-46 'Dinah', capturing the beautiful lines in both versions. The LS kit is good with very fine detail and engraved lines, though I do feel it's a little fatter in the fuselage, engine pods & wing thickness 
 

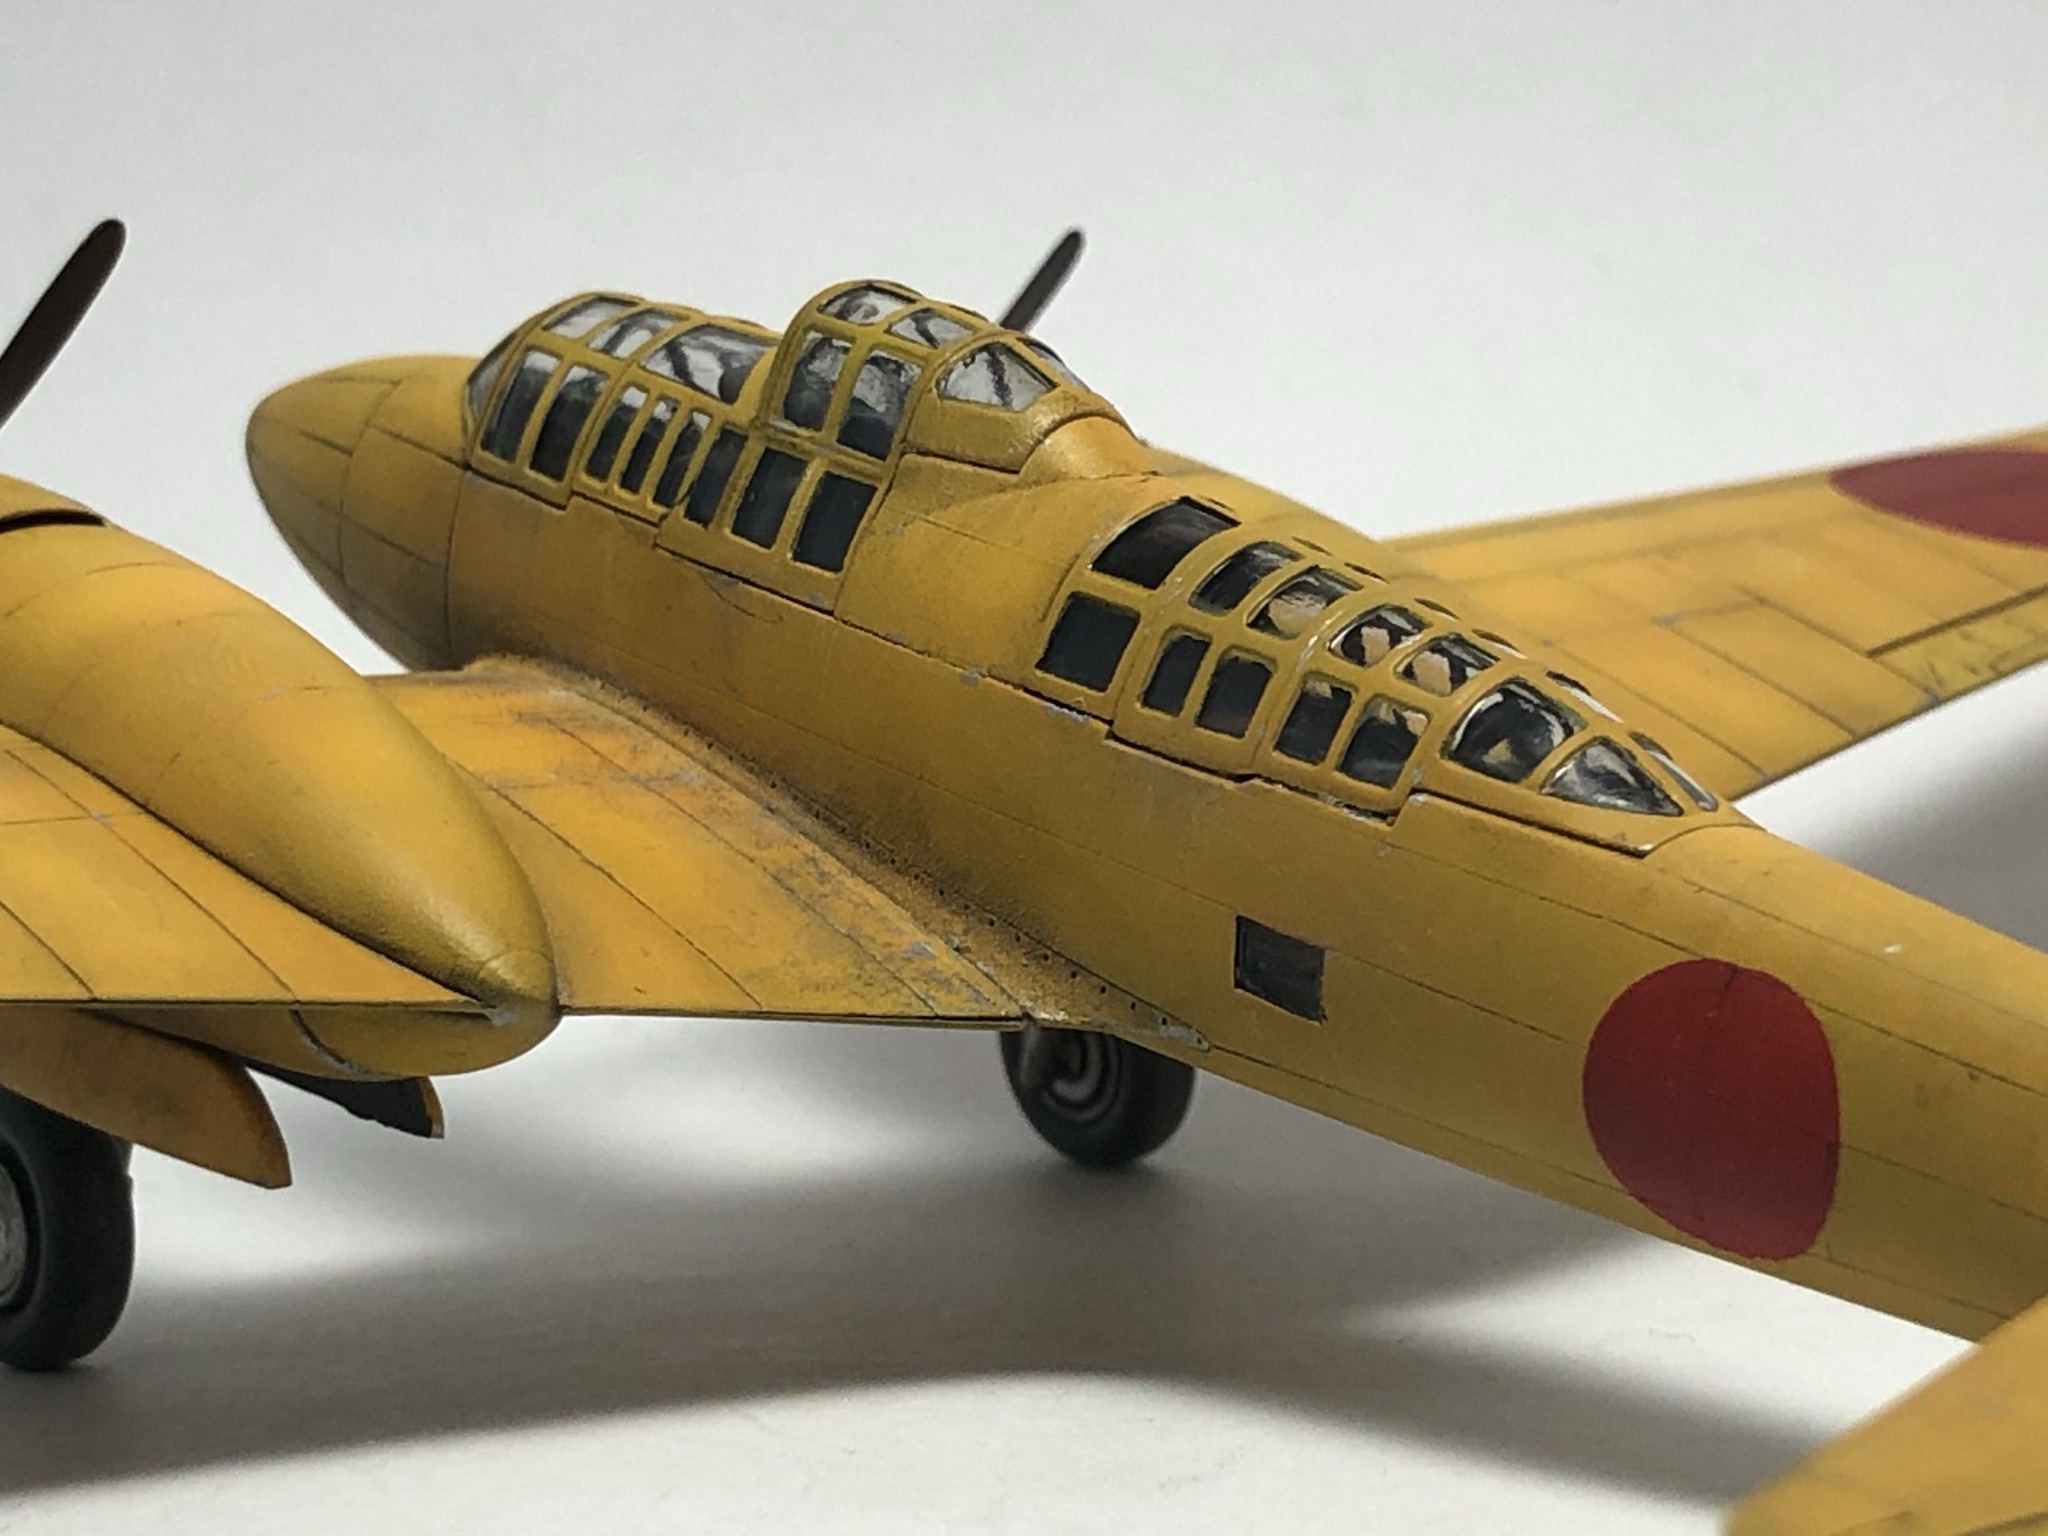
'The trainer needed some details scratch built as the kit was only supplied with one seat and bulkheads way out of scale. Fortunately the Hasegawa kit comes with dual controls and seats so I was able to integrate these. Though not a perfect it they filled the rear canopy nicely. With some advise I painted both interiors on the -II's in a dark blue grey, mixing the shade from SMS paints using various shades. The - III's interior was painted in a greenish khaki. 


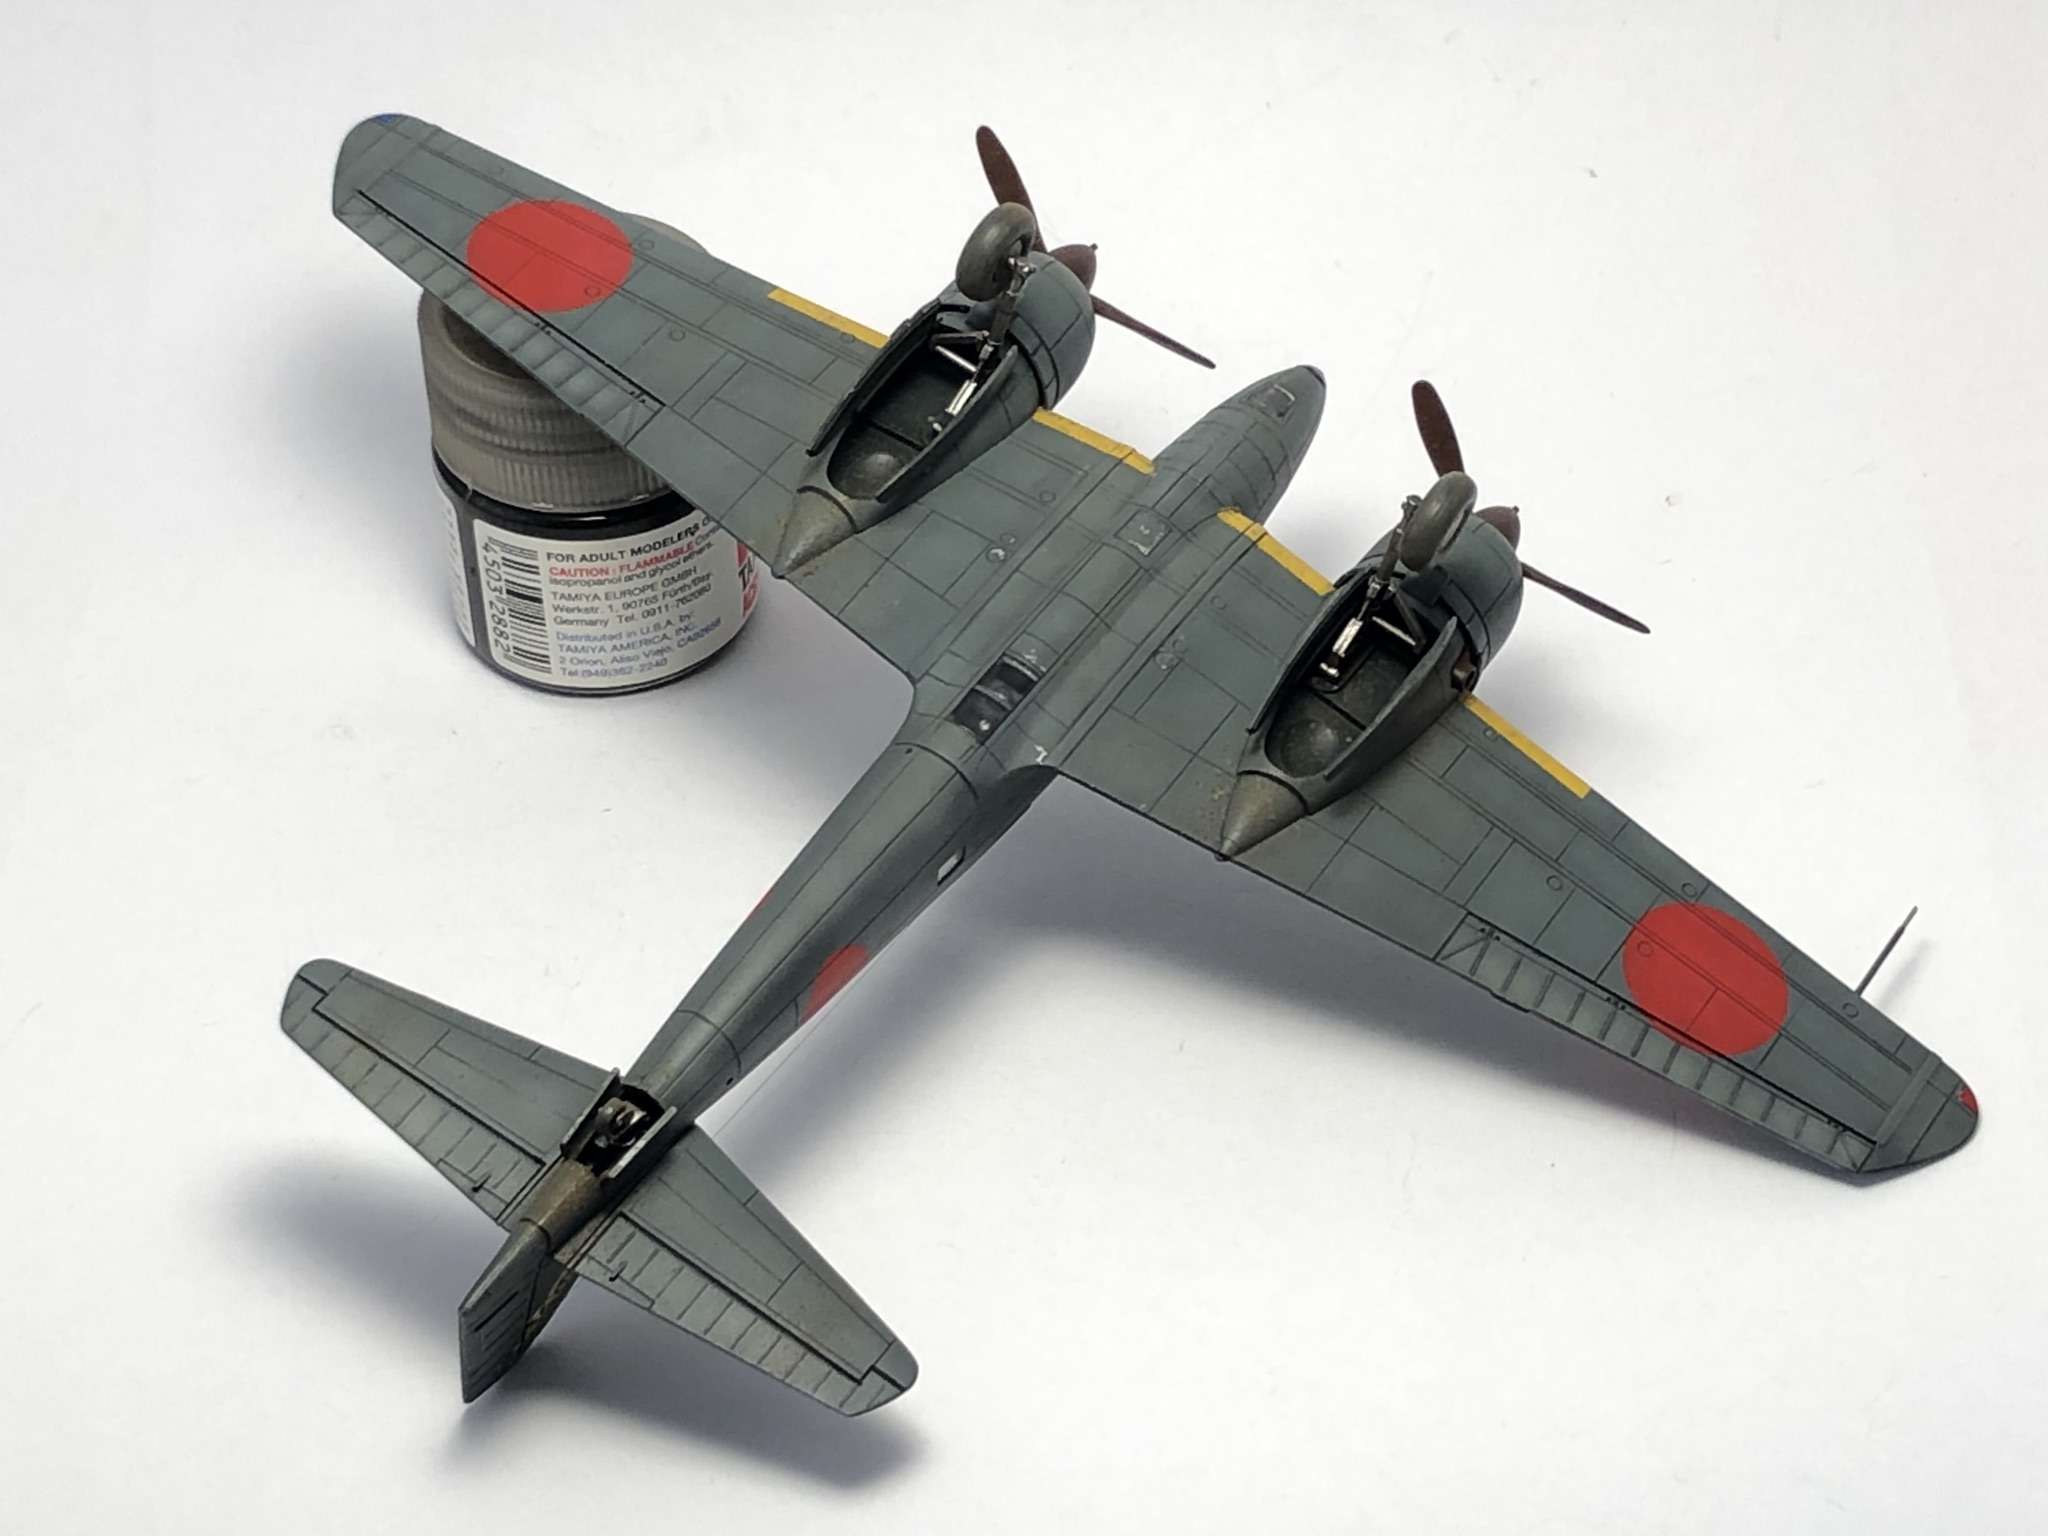
'From here the main construction started with all three being fully built up. The LS kit went together well with minimal filler needed around the wing roots and underside between the wings. Both Hasegawa kits were a perfect fit with no putty needed at although care is needed when trimming the engine pods from the sprue to avoid problems when joining them to the wings.
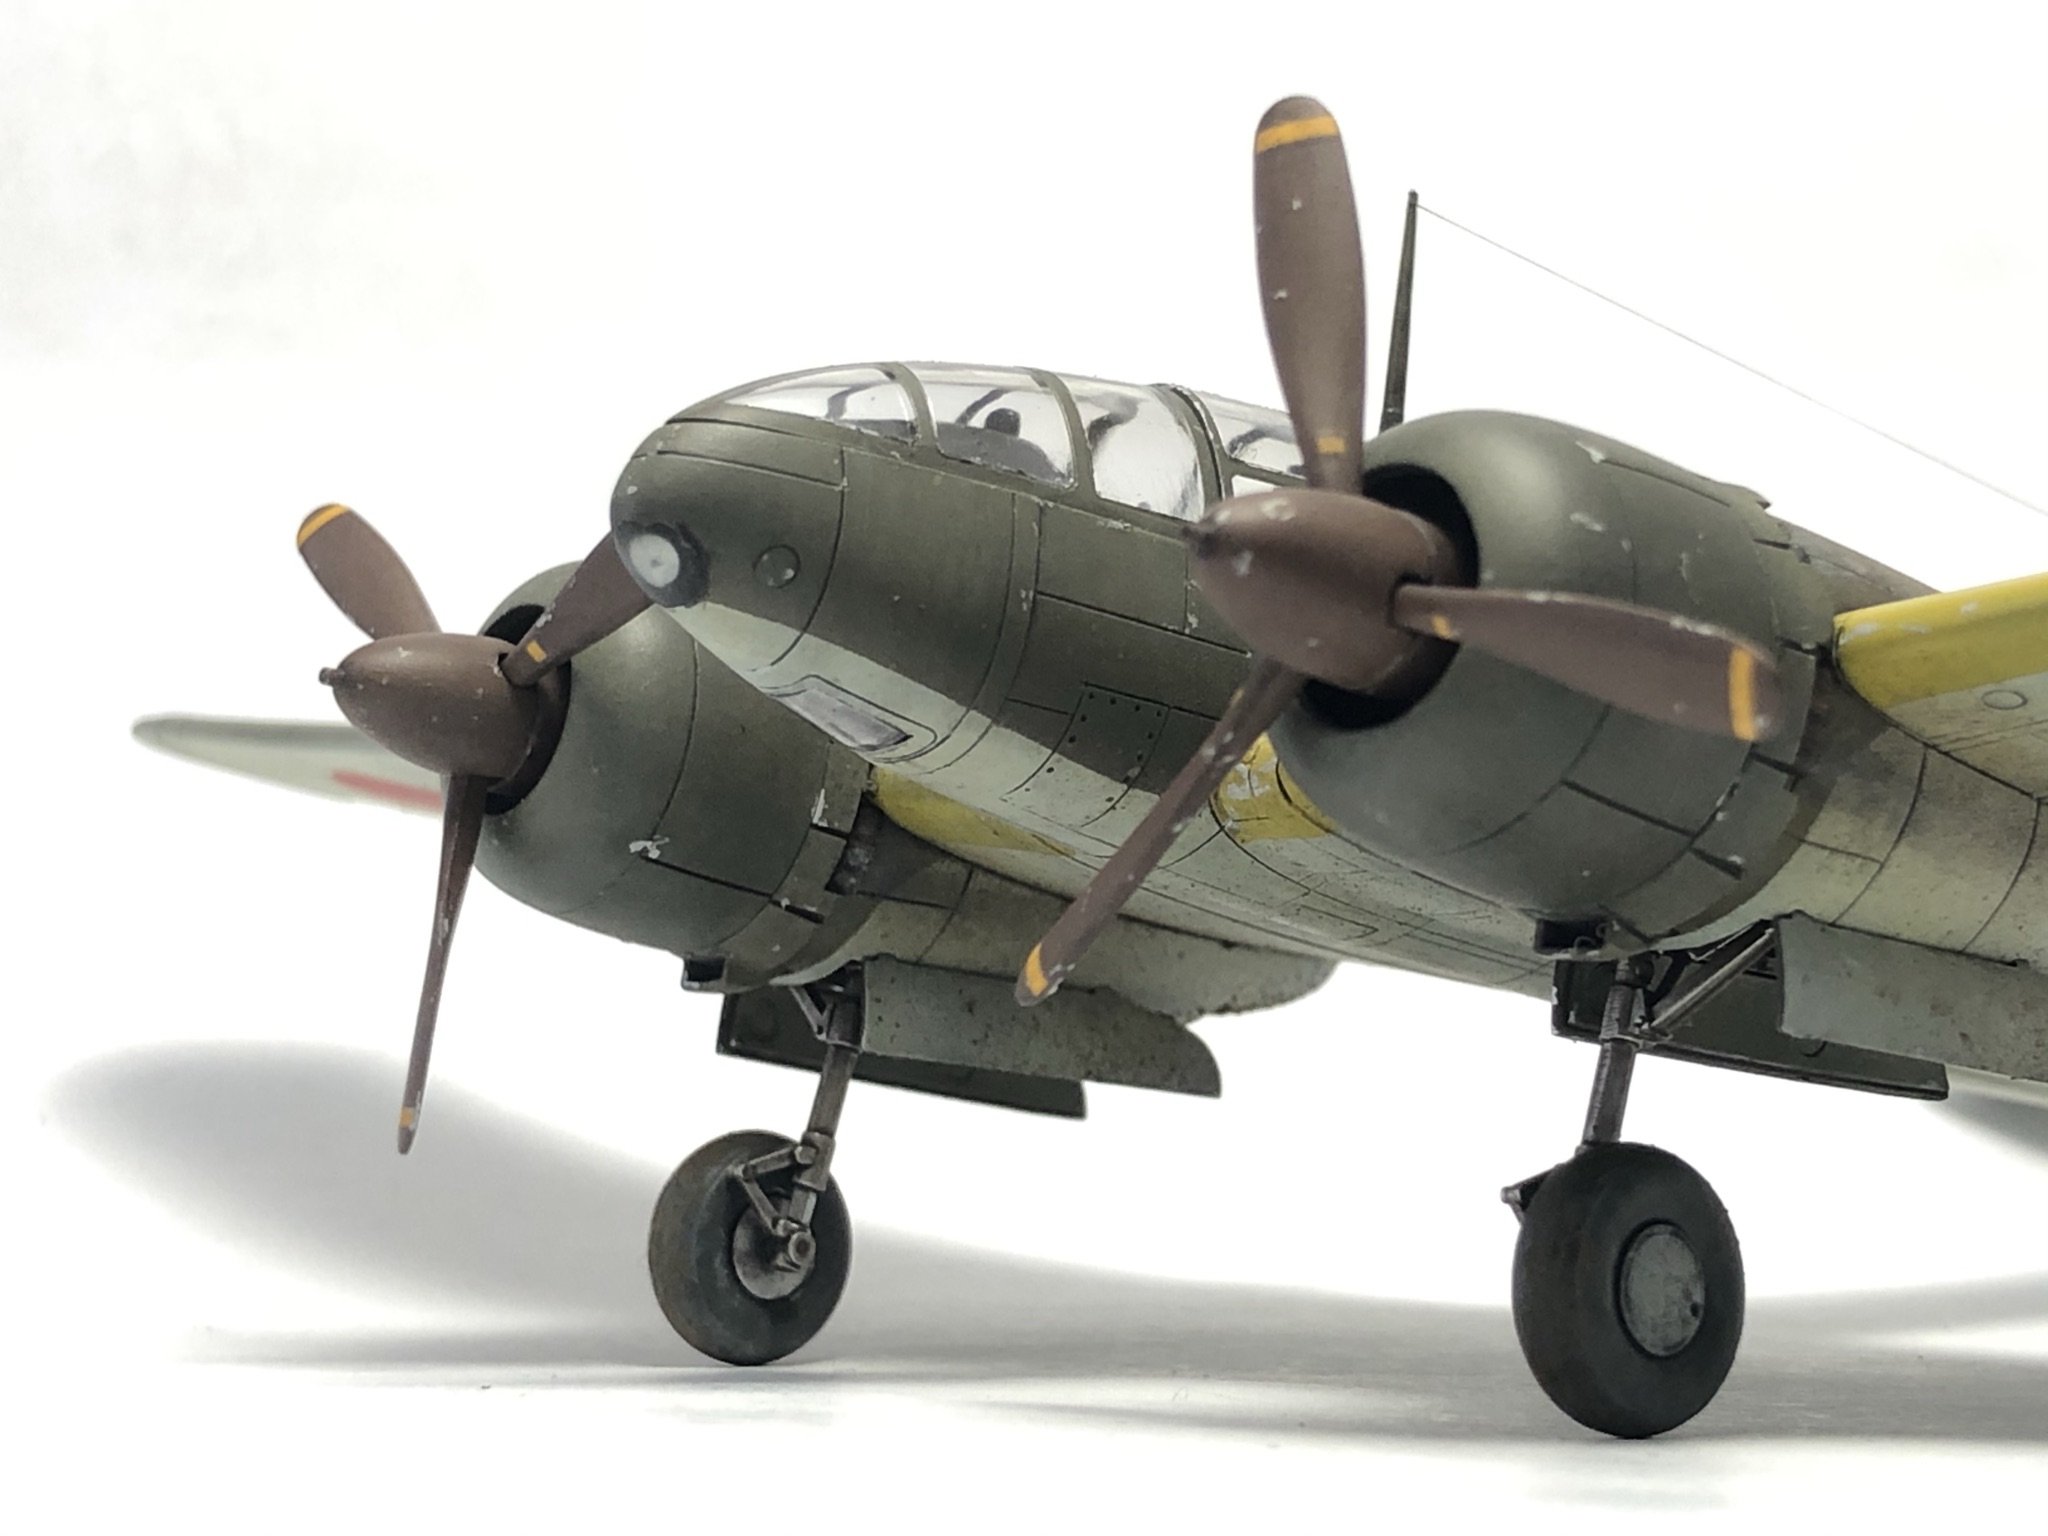
 

'Onto the painting. All three were black based and highlighted in various shades of white, grey and tan. For the trainer, I used SMS Trainer yellow, Marigold Orange & School Bus Yellow to achieve an overall orange-yellow shade, leaning more to the yellow  and with a slight fade. I was inspired for the -II and -III from photos and a painting of some distinctive machines. The -II was finished in a blue-grey colour, which SMS Kure Grey fitted the bill for quite well without too much fade or modulation. This scheme is believed to have been on some machines although no photos exist. The -III was finished in an earth brown which had an olive hue to it. This was made from SMS Olive Drab & RAAF Earth, modulated with Middle Stone for fading. I wanted this one to look as though it had been in the tropics for a while though still in front line service. 
 

'With the painting completed it was time for the markings. All Hinomaru, IFF and flight bands were painted on with only tail insignia decals being used. The decals in the LS kit were unusable and the wrong shade so the tail markings for the trainer were made from what I had on hand and are fictional. Though the large numbers on the wing undersides most likely did not exist, I liked the look it gave so they were kept. With a black/brown wash made from Tamiya panel liner plus some pigments and weathering pencils for exhaust, they were completed and ready for display. One extra step I took with the -III was the construction of the base from an old photo frame. The photo provided showed the aircraft in a field, abandoned and in disrepair. Though my model is serviceable I had the scene layout in my mind throughout the build and I think this addition really finishes the model. 
 

'Though I enjoyed all three, I have to give the Hasegawa Dinah the cake here. They build up very well and I prefer their shape to that of the LS model, though for the time (1974) I am impressed. I would loved to have built the Hasegawa trainer variant but it's hard to find and if found not cheap. Now to build the -II in surrender scheme plus an interceptor version . . . the list goes on.'
 

With very special thanks to Jason for sharing this trio of superbly finished Ki-46 models. 


Image credit: All © 2020 Jason Brash