Sunday, 19 September 2010

Something for the Weekend


Courtesy of JASIG Team Leader Gary Wenko we have some images of these recent kits to share.


The Unicraft 1/72nd resin kit of the Ki-73 is a "single engined version" of the Ki-83. Unicraft specialise in "What-If" versions of Japanese secret projects and prototype development aircraft. Gary notes that despite the rough resin castings of these kits they can be turned into very interesting models. Having seen what Gary has done with some of them I can testify to that! Check out their website for the full range.


The second kit is the Anigrand 1/144th scale Rita, which comes with "bonus" kits of the Kokusai Ta-go, Ki-119, Rikugan Ki-202 Shusai-kai and Ki-115 Tsurugi. Gary notes that the Anigrand kits are very nicely molded with crisp detail.
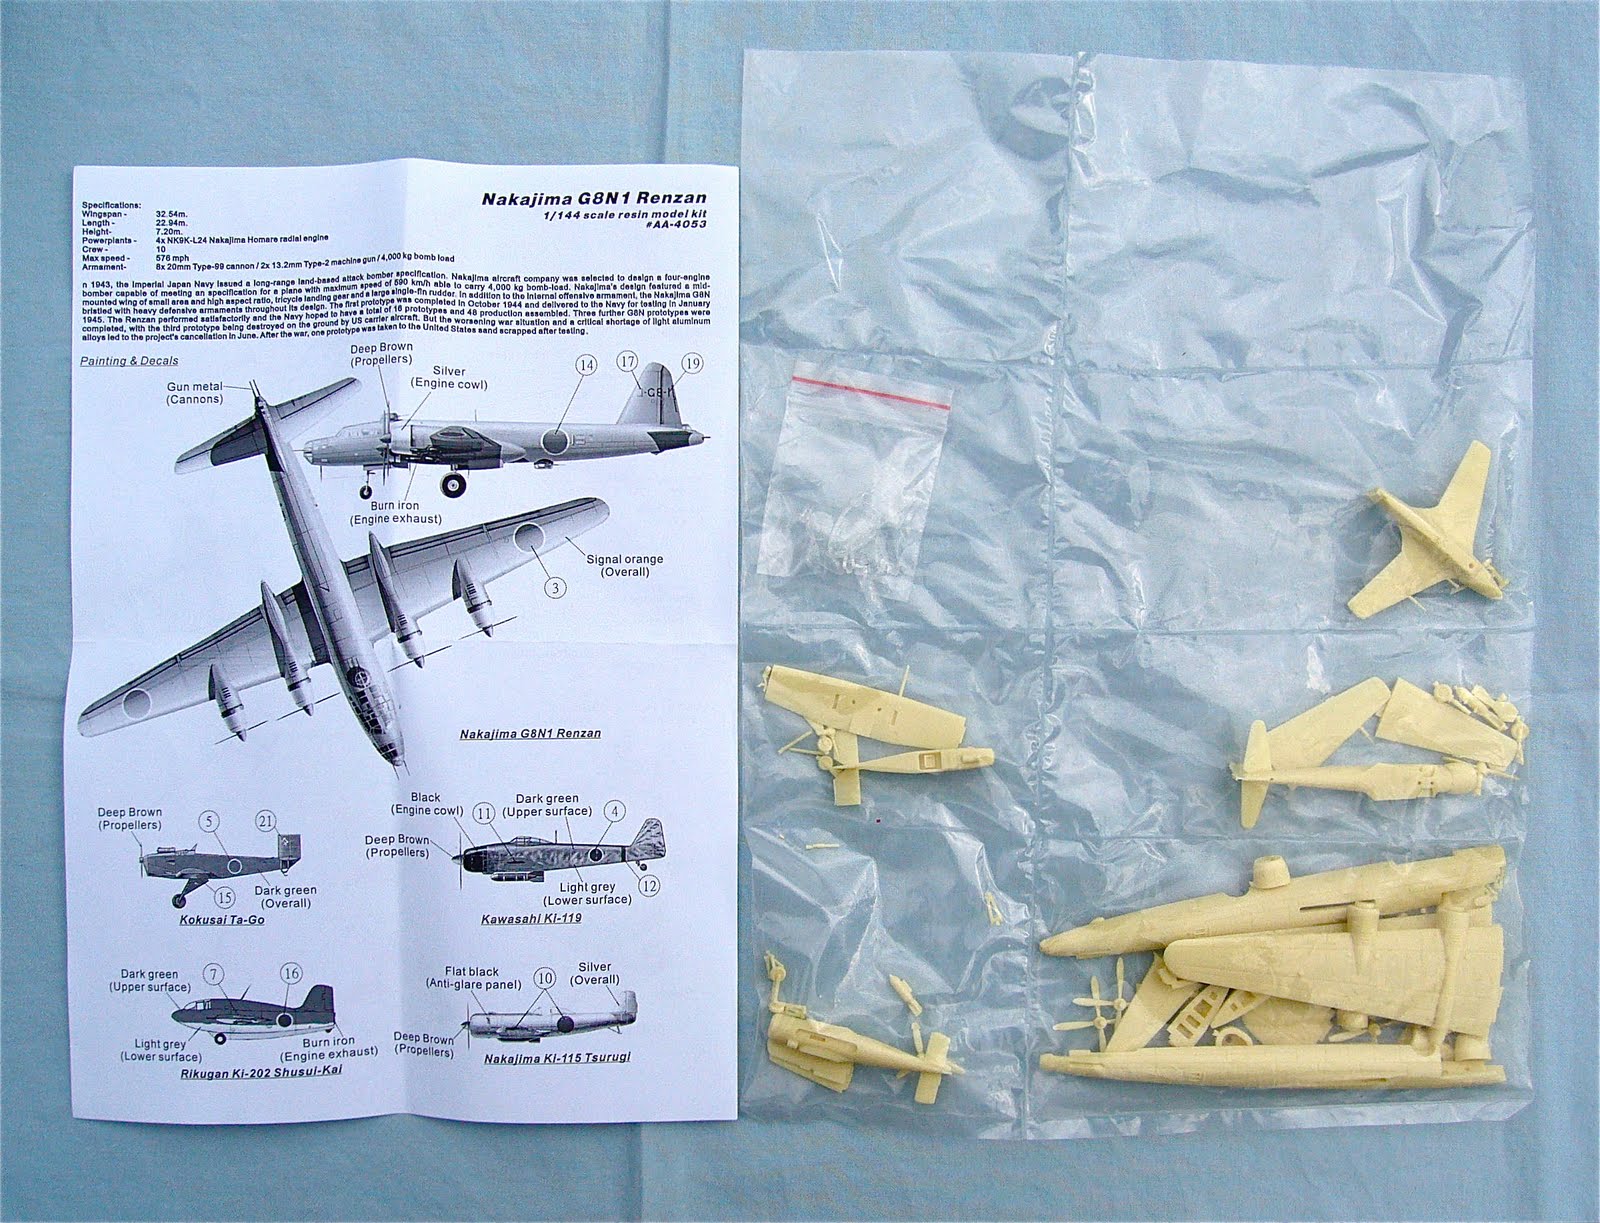

Anigrand have other Japanese "heavies" available in their "Huge Bird Collection" 1/144th scale range, including the G10N1 Fugaku, Kawasaki Ki-91 and Nakajima G5N-1/2 Shinzan.


Due to be published by Grub Street at the end of October is a revised edition of Japanese Naval Air Force Fighter Units and Their Aces 1932-1945 by Ikuhiko Hata, Yasuho Izawa and Christopher Shores. The Amazon release blurb says:-

"This book is a companion volume to "Japanese Army Air Force Fighter Units and Their Aces, 1931-1945", published by Grub Street in 2002. As such it also represents a major updating and rewriting of Messrs Hata's and Izawa's earlier book of similar title, published in the USA some 20 years ago. The book commences with a comprehensive account of the operations of navy fighter units throughout the period under review. This is followed by individual sections detailing the history and achievements of each unit involved, be it land-based or aircraft carrier-based. A major section then provides biographical details regarding all pilots claiming eight or more aerial victories. As might be expected of such a work, prolific appendices provide detailed listings of all pilots known to have claimed five or more victories (and thus considered to be 'aces'); listings of the graduation from training of all Japanese Navy fighter pilots, and of fighter pilot casualties. The book is profusely illustrated with photographs, maps and artist's side-view drawings and paintings of aircraft relevant to each of the units described."

Was it really 20 years ago? Goodness me. The new dustjacket illustration looks good but it brings to mind yesterday's blog post!

Image credits: All kit images courtesy of Gary Wenko, © 2010 Unicraft & Anigrand; Dustjacket illustration © 2010 Grub Street via Amazon UK

Saturday, 18 September 2010

Pactra Authentics and the Japanese Air Force


Further to my blog about Humbrol Authentics, Fred Boucher kindly sent me these images of Pactra Authentic International Colors "Japanese Air Force" set. The paint colours seem to be the same as in the Humbrol set, although the Mauve is called Violet, but a preliminary examination of one or two bottles kindly donated by correspondents reveals there to be slight differences in hue. However, the basis for the set appears to be from that same 1964 IPMS "Color Guide for Japanese Aircraft 1941-45".


The paints were also marketed as individual bottles and I can remember buying them that way from the rack in a department store in Hong Kong in the late 1970's. Pactra was new to me at the time - I was used to Humbrol - and at first I viewed them with some suspicion. But once I had tried them I found them exceptionally good for hand brushing. Hobby paint seems to be one of the few things in modelling where progress has resulted in a retrograde product!  Nowadays when hand brushed most of the enamel hobby paints require a few dozen coats to cover adequately and in the case of Humbrol you get gloss, matt and satin finishes all in one tin - and invariably all on one model! As a COB I look back fondly to the days when you could get smooth, thin, one coat coverage with a hairy stick and I wonder just what went wrong with paint technology that Humbrol and Pactra's magic (to use) formulae have been lost and forgotten (are you listening Hornby?).


I used Pactra's IJN Gray to paint Hasegawa's early A6M3 Zero, the one in brittle, dark green plastic with all the rivets. Yes, even as that well-known blue-stripe bird reportedly flown by Saburo Sakai, the A6M2 tail code on the A6M3 worried me then not a bit. The light paint covered the dark plastic well - I can't remember applying more than one coat but probably did. Even at the time I was troubled by this very light, almost off-white, grey. Why on earth, I pondered, would the Japanese, operating over rich green jungles and deep blue seas, paint their aircraft this colour, worthy of winter on the Eastern Front?  The cover of that Model Art magazine said it all. But it was the colour depicted in most illustrations of the Zero, from art to box art, from magazine to book, and has curiously persisted in artistic representations, on models and in the psyche to this very day.


During the mid-1970s Pactra paints were apparently marketed in the UK by Revell, although I never encountered them there. The vintage advert shown above was published in the July 1974 (Vol.5 No.58) issue of Scale Models magazine in the UK.

Any more memories or facts about Pactra - or Humbrol Authentics - or even old Zero models - will be very welcome here.

Image credits: Pactra set courtesy Fred Boucher, © Pactra circa 1970; Model Art magazine © 1976; Revell Pactra advert © 1974 Scale Models magazine

Thursday, 16 September 2010

Pat's Pete


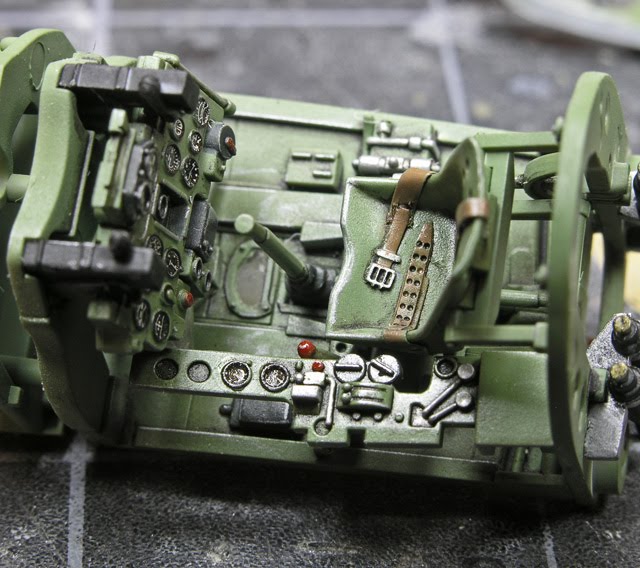
Sticking with the IJN floatplanes theme here are some images of the Hasegawa 1/48th Mitsubishi F1M2 "Pete", that surprising dogfighter, kindly contributed by the builder Pat Donahue. Love those fish!


Pat's own notes on the build, entitled "Sushi Tonight", follow:-

"The model is the Hasegawa kit with the following additions and corrections: 
  • The cowl had internal structure added, the engine had the prop governor and control rod added along with spark plug wires, inner cylinder drain lines and the oil sump line. 
  • The front cockpit had seatbelts, cowl flap crank, magneto switch, air temp gauge, control rods from carb heat and oil cooler control quadrant, valves and lines on top of the oxygen bottles, seat bungee cord and pulleys, throttle, prop and mixture control rods, flap actuating rod, fuel valves, rudder trim wheel, trim cables, and wiring added. 
  • The gun sight had the auxiliary sights added. 
  • The rear cockpit had telegraph key, wiring, control cables for the camera hatch, trailing antenna cable, battery cables and battery box lock downs, and seat adjustment handle added. The rear cockpit compass had the compass rose,  prism and supports added. The chart board was added. The observation periscope was detailed up. The gun had the sights added. 
  • The main float had the retractable  mooring cleat and stiffener plates added along with the mooring rope and the outrigger floats had the drain plugs added.The aileron bell crank cables were added to the wings. The wing  tie down points were drilled out, and the control bell crank windows were added. Bulbs were added to all the nav lights. The flying wire fairleads were built out to the correct profile.


The model was painted with Xtracolor and White Ensign Model paints, kit decals were used. It represents a Pete found at the Sasebo Naval Base at the end of WW2. The right float is evidently a replacement. It appears from photos that the tail codes were lightly oversprayed to tone them down with the exception of the Kanji symbol. Photos of this aircraft seem to show that the paint demarcations were done with some type of mask or stencil - perhaps hand held. The patterns are the same but placement varies slightly in some cases. Depending how the stencil was placed and the angle of the spray gun, color demarcations went from very hard blends to somewhat softer blends sometimes even along the same color demarcation line. The flying wire fairings were camouflaged.  Seaplane cradles sometimes had thick felt or burlap placed over the cradle support blocks to protect the float bottom. These items are all duplicated on the model. Photos also show that the antenna configuration and tension on the aerials varied.  Against all odds this little airplane survived the war and was destroyed by the occupation forces in 1945.  The 1/48 scale fish were scratch built and not having any plans I cannot vouch for their accuracy or colors..... 


I would like to express my appreciation to Nick Millman and James Lansdale both of whom were very helpful in researching the colors and the aircraft. Without their help this model would not have been possible."


Image credits: All courtesy of Pat Donahue, © 2010 Pat Donahue


Wednesday, 15 September 2010

Jeff Groves IJN Floatplane Collection


From correspondent Jeff Groves come these beautiful images from his collection of IJN floatplane models. All the models are to 1/72nd scale. There is no doubt that the diversity of IJN floatplanes makes them a very attractive modelling theme.


The first is the Jo-Han Rufe (believe it or not!).  Jo-Han issued a model believed to be based on the LS kit and which contained optional parts to be be built as either an A6M2 with undercarriage or an A6M2-N with floats. The model was completed more than 30 years ago, but Jeff took it back to the bench for a little repair and updating.  The scheme is one of the "purple" Rufes, Jeff had read reports of the upper surfaces of some Japanese aircraft being chocolate brown, and felt that was more likely than purple.  He replaced the canopy with vacuform, and scratchbuilt a beaching dolly, but decided not to correct the camo. I think it looks excellent.


Next is the Tamiya Seiran which Jeff reports is an excellent kit in all respects.  He repositioned the control surfaces and flaps, and modified the beaching gear.  Photo-etch seatbelts were added to the cockpit.


The "ramp" in these pictures is actually a piece of foamboard.  Jeff lightly sprayed some dark areas using black aerosol paint, and then misted a thin layer of appliance touch-up paint over that.  The lines were applied with a drafting pen.  The total cost was about $10.00.  All pictures were shot outside in natural light, the board angled to take advantage of a treeline in the background.


Finally here is the Xotic-72 (previously Aviation Usk) E15K Norm, with a lot of modification.  There was little cockpit detail, so Jeff made castings from the Tamiya Seiran cockpit and started working from there.  He also made castings from the Seiran control surfaces and used these to replace the originals, as they had no surface detail.


The wingtip float supports and interior wells were built with Plastruct.  Jeff removed the cowling, and inserted a spare radial engine.  The cowl flaps and exhausts were added, and he replaced the propeller blades with some from the spares box.  The beaching dolly was scratchbuilt, again from Seiran castings (wheels) and Plastruct.


Thank you to Jeff for kindly sharing these lovely images of such well-presented and inspiring models. More please!

Image credits: All courtesy of Jeff Groves, © 2010 Jeff Groves

Monday, 13 September 2010

Empire City Decals ~ Colorful Hayates


From Brian Weidemann of Empire City Decals comes news of a new set of decals for Colorful Hayates now available in both 1/48th and 1/72nd scales. This intriguing selection is based on unpublished photographs in Brian's collection. Very usefully the reference photos are included in the set which will allow modellers to interpret the schemes themselves if they wish to do so. Schemes for Hayate models are limited with the same old favourites often seen again and again so this sheet is especially welcome. It is also pleasing to see the less well-known China-based 9th Sentai included. Several of their Hayate and Shoki aircraft ended up in Chinese Kuomintang markings as war trophies.


A photograph of 9th Sentai Hayates has been shown before on this blog here. The 9th had been a Shoki equipped Sentai transferred from Manchuria into China during February 1944 as part of the preparations for the Ichi-Go offensive. Initially deployed to Hsinhsiang to provide air defence it was noted that the unit only had about 10 aircraft on strength. At the time this unit was under direct Army command. By May 1944 the strength of the unit had risen to 11 Ki-43 Hayabusa and 14 Ki-44 Shoki aircraft. On June 11th 1944 the 9th suffered at the hands of the 449th Fighter Squadron (P-38) over Anking, losing Captain Michio Iwata the 1st Chutai leader and Sergeant Kazuyasu Kamidozono. On June 13th 1944 the unit lost Sergeant Kazuo Miyasaki to the guns of another 449th P-38.

At the end of August 1944 the 9th had only 6 officer pilots against its authorised strength of 13, 5 rated ‘A’ and 1 rated ‘B’. However the unit fielded all of the 30 authorised WO & NCO pilots, with 6 rated ‘A’, 4 rated ‘B’ and 20 rated ‘C’. These ratings were based on the number of operational flying hours attained by each pilot. One of the least experienced units in China, the figures were reflected by its rather undistinguished combat record, although the unit had some success against the early B-29 operations.

The authors of Monograph # 76 noted that the ratio of Japanese air strength against Allied air strength at the beginning of the 1944 operations was 1 to 2 but that by the time the offensive against Kweilin was launched the ratio had dropped to 1 to 5.3. They commented further that:

“ As veteran pilots were continually lost they were replaced by inexperienced men who had just completed basic training, so that the skill of the pilots dropped rapidly in quality. The supply of planes and parts from Japan proved inadequate, making it necessary to put back into service even obsolete planes, which previously had been used as trainers in the rear.”

By November 1944 the 9th was still at Hsinhsiang but now under command of the 8th Air Brigade with a three-fold mission to engage in decisive air battles, to protect vessels on the Yangtze River from Hsiaochikou to the vicinity of Hankow and for the air defence of the Wuhan area. From November 1944 onwards the unit operated from Canton, moving to Nanyuan airfield near Peking in March 1945 and finally ending the war at Nanking (Nan Jing) and Suchow (Su Zhou) where its abandoned Ki-44 and Ki-84 fighters were seized by the Republic of China Air Force.

With the steady attrition of its experienced pilots one of its most disastrous days came over the Tien Ho and White Cloud airfields at Canton on December 27th 1944 with the loss of 5 pilots; Major Takehisa Yakuyama the Sentai commander, Sergeant-Major Tokusaburo Nakagawa, Sergeant Katsuji Kato, Corporal Kuniji Torizuka and Captain Eiji Yuzuki the 1st Chutai leader were all killed in action. The victories were claimed by the 74th Fighter and 118th Reconnaisance Squadrons.

The most notable flyer in the 9th was Lieutenant Yoshitaro Yoshioka who had the dubious distinction of force-landing a Ki-44 without power twice, a notoriously difficult feat. On the second occasion, on July 22nd 1944 he was badly injured and lucky to survive. After the death of Major Yakuyama on December 27th 1944 Yoshioka led the unit, surviving the war. He remained in China for a time after the war, training Chinese pilots to fly the Ki-84. In China he had claimed only 6 aerial victories.

According to Minoru Akimoto the Sentai insignia was an abstract design combining the historical spear used by the warrior Kiyomasa Kato during Japan’s invasion of Korea in 1596 and the character ‘Na’ representing the unit’s first commander Lieutenant-Colonel Seisaku Namba, painted across the fin and rudder in the Chutai colours of white, red or yellow. The Sentai Headquarters Flight (Sentai Hombu) displayed the design in blue. According to Katsushi Owaki the marking was designed from the Kanji charactor for the number "9"(九).

Image credits: Courtesy of Brian Weidemann © 2010 Empire City Decals

Friday, 10 September 2010

Tamiya 1/48th A6M5 by Dave Sherrill


Dave Sherrill has kindly contributed these images of his Tamiya 1/48th A6M5 build. Dave had read Dan Salamone's appraisal of Tamiya's A6M5 but his experience was not the same:-

"I think we had different experiences in building this model.   I began construction of this kit shortly after its release and that was some time ago and I honestly can't remember any details of the build other than nothing stands out as having been really bad or frustrating.  I did happen to make a mess of the canopy when I attempted to use the kit supplied masks.  I should have taken my time cutting them out, but I rushed the job and they didn't look all that good to me once they were on.  Off they came and I tried to re-mask using Bare Metal Foil.  I really made a mess of that too and decided at that point to buy a new clear sprue from Tamiya USA, a masking set from Eduard and start this process all over again.  It only took Tamiya six months and several phone calls to send me a replacement sprue.  But, once I got my new canopy I finished the kit in about a week.  While I can't recall all the details of the build I do know that at the time I was building it I thought it was one of the best fitting kits I'd ever worked on.  However, I've built enough models in my time to know that modelers often have completely different experiences with the same kit.  Kits that are supposedly shake and bake for some prove daunting, humbling, experiences for others.  For instance, I will not attempt to build another Tamiya Storch or He.162.  This Zero however was a lot of fun and I'm really looking forward to building the new A6M3.  


"The cockpit alone was simply the best kit cockpit I have ever worked with.  The only addition outside of the kit parts were some Eduard PE seatbelts.  I used Tamiya acrylic paints and the kit's hinomaru decals.  The decals reacted well to my repeated applications of Solvaset as I attempted to get them fully snuggled into every line and rivet.  I will attach some more photos of my Zero because it is a well engineered and excellent fitting kit in my opinion.  I entered my Zero at this year's Seattle IPMS show in April and took first place in 1/48 single prop Axis (Pacific)."


Image credits: All photos courtesy of Dave Sherrill