Saturday, 6 June 2020

Dan Salamone's Fine Molds 1/48 Ki-15-II


Dan Salamone has kindly shared these images and build report of his superlative 1/48 Mitsubishi Ki-15-II project from the Fine Molds kit. Known in Japanese Army service as '97 Shi-tei' (九七司偵 for 97 Shiki Shireibu Teisatsu-ki  - 九七式司令部偵察機 - Type 97 Headquarters Reconnaissance Aeroplane). Over to Dan then:-


"Hi all, here is my recently completed 1/48 Ki-15II Babs from Fine Molds, kit # FB 25. The kit has some really beautifully detailed cockpit and engine parts, and generally good overall fit. The main exception to that were the side observation windows, which needed a fair amount of putty and sanding to fair into the fuselage correctly.
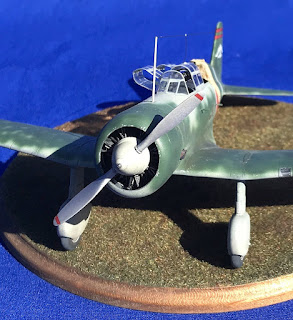

"The kit features a single piece for the greenhouse style canopy, so I replaced it with a vacform canopy and canopy mask from Dead Design in the Czech Republic.


Both of these items were of exceptional quality, and highly recommended. The Ki-15 featured side opening pilot and observer sections, hinged at the center line. In addition, the pilot's canopy sat on rails (port side) both front and rear, whereas the observer's canopy lacked that feature on the port side. Finally, there was a distinctive 'sill' that bridged the fixed portions of the canopy, so if you wish to model the open parts, this will also need to be added. As an aside, the C5M2 version of the Babs used by the IJN featured a pilot's canopy that slid backwards, rather than being hinged on the starboard side.


"For painting the model I used the new AK Interactive 'Real Colors' thinned with Gunze lacquer thinner and retarder. Colors used were # 329 (Hairanshoku) for the cockpit blue-grey, # 328 (Hairyokushoku) mixed with # 303 (IJN J3) for the overall base grey-green, and # 331 (Midori iro) for the dark green camouflage. I based the finish on an 8th Sentai example seen on a YouTube video. The kit decals were used, and may have been the best decals I've ever used, reacting perfectly to Micro Sol and Micro Set solutions. Based in Burma in early 1942, the aircraft had very subtle weathering which was achieved using MiG 'Oilbrushers', as well as the recent AK weathering pencils. Both of these products are very highly recommended.


"Other than using the aftermarket vacform canopy, I added crew steps on the port side and under the left wing trailing edge. Recent kits from Fine Molds feature some really subtle and exceptional detail, for example the gap between the rudder and tailplane, and bulb detail in the under fuselage navigation light. Opening the canopy was well worth the added work and time, as the beautifully molded details can now be seen, together with the photo etched seat belts from Eduard also used. The radio antenna is a product called invisible thread.


"And in full disclosure, the reason why I added the dirty tarp near the rear canopy was due to getting a drop of Tamiya liquid cement on the rear canopy section. Since it wasn't feasible to fix that mistake, I opted to cover it instead.


"The kit, and Dead Design products for it, are highly recommended. I am somewhat on the fence regarding the AK Real Colors, they look nice, but I still prefer the way that Gunze lacquers airbrush." (AK recommend using their own brand thinner but I don't know if that makes a difference?  Ed.)


Dan's model represents an aircraft of Hiko Dai 8 Sentai operating over Burma during 1942. The 8th Sentai was formed in August 1938 from Hiko Dai 8 Rentai (8th Flying Regiment) and three years later its 1st Chutai became a reconnaissance unit whilst the 2nd to 4th Chutai operated Ki-48 light bombers. In practice the reconnaissance Chutai operated as detached elements assigned to each bomber Chutai for navigational support as well as pre and post-mission reconnaissance sorties. The distinctive unit marking, referred to as 'Takohachi' ('octopus-eight'), was devised within the unit as a combination of '8' and reportedly the phonetic characters 'hei' (へい) for Heito in Taiwan (now Pingtung or Pingdong in Takao Prefecture, south Taiwan) where the unit was originally based, although the same pronunciation for 'hei' (of a different character) can also mean army or warfare. 

The Ki-15 was introduced to operations in 1937 when on 17 July the second additional prototype was flown In Tianjin by Maj Yuzo Fujita and WO Sadao Eguchi of the 15th Flying Regiment. On 24 July the first additional prototype was flown from Fussa to Chengde, China by Capt Takeo Aoki and 1Lt Takeshi Ohmuro. The former Asahi aircraft 'Kamikaze' had been flown to Tianjin on 14 July for evaluation flights by the 15th Flying Regiment. The first additional prototype and second additional prototype flown by Capt Heigo Matsuzaki and 1Lt Fuhito Ishizu of the 15th Flying Regiment subsequently formed the Aoki unit under the direct command of the HQ Temporary (or Provisional) Air Corps (Rinji Koukuu Heidan - 臨時航空兵団) which had been established to conduct Army air operations over China. The first operational sortie of the Ki-15 was flown over Luoyang on 22 July 1937 by Capt Matsuzaki and 1Lt Ishizu of the 15th Flying Rentai, whilst the first sortie of the Aoki unit was a reconnaissance of Jinan airfield on 26 July by 1Lt Ohmuro with Capt Aoki as observer. Production of the improved Ki-15-II variant began from September 1939. By the outbreak of the Pacific War the Ki-15-I type was known to RAF Intelligence in Air HQ (India) as the Mitsubishi Type 97 'Kamikaze' or 'Army 97' light bomber/recce aircraft with relatively comprehensive details of its characteristics and performance, although its supposed bombing capability had been confused with the unidentified Ki-36 Chokkyo Army co-op aircraft 'Ida'. 

   
Identification page for Type 97 Model I from Japanese Service Aircraft, Air HQ (India) December 1941 

Reference and acknowledgement: 'Fighting Records of Japanese Bombers and Reconnaissance Planes 1914-1941' by Dr Yasuho Izawa M.D., Ph.D.
'Japanese Army Air Force Unit Insignia' by Minoru Akimoto, Koku Fan magazine, 1977 (courtesy of Ken Glass)
'Japanese Service Aircraft', Air HQ (India), December 1941 

Image credit: All model photos © 2020 Dan Salamone; Type 97 identification page author's collection.
 

Saturday, 30 May 2020

Two Resin Rarities


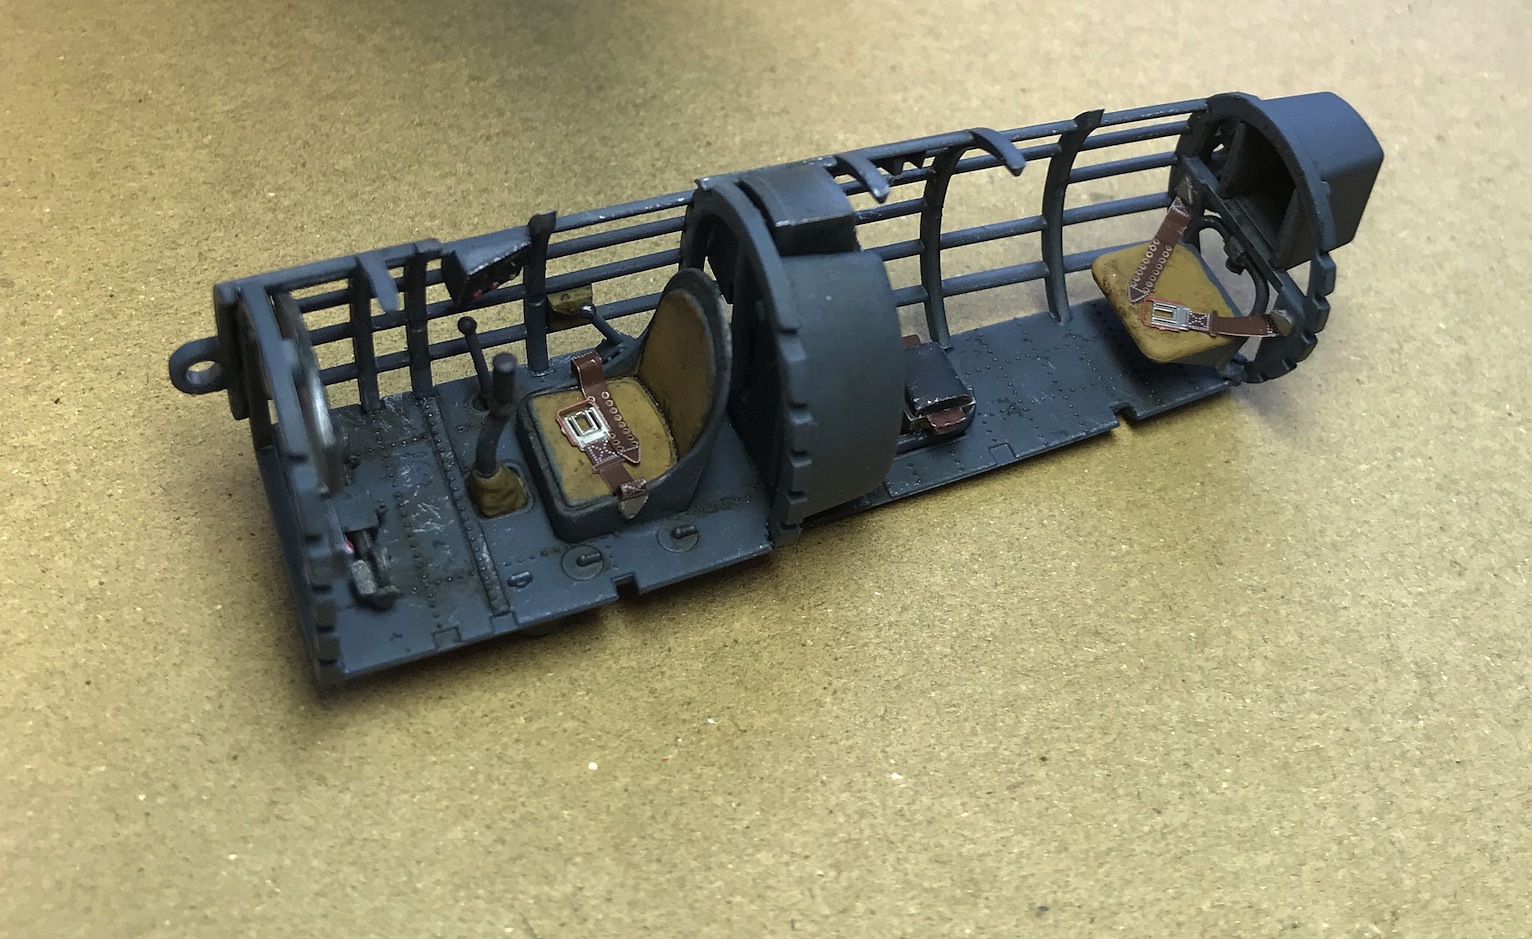
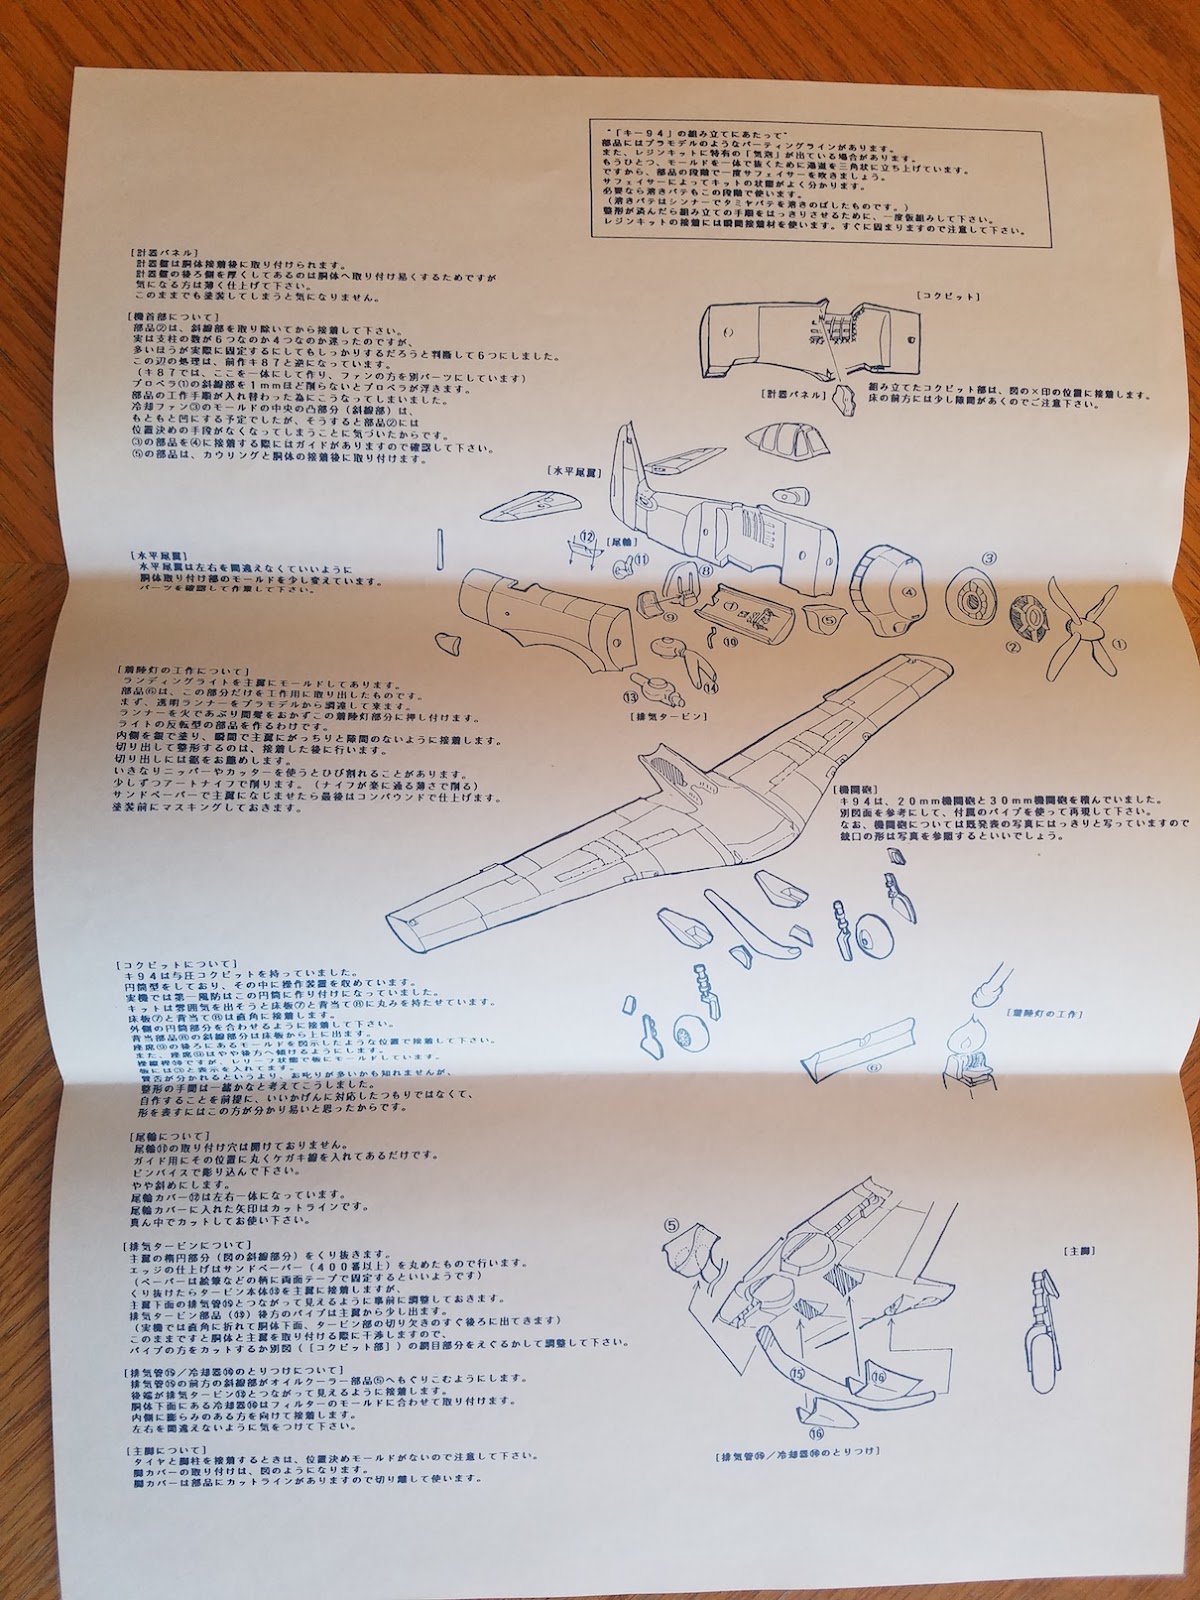
Two more rare resin kits from the collection of Kevin Bade which he has kindly shared here. Both are to 1/72 scale. Kevin believes they were made by a Japanese hobby shop and he bought them via a friend with contacts in Japan. The only English is 'Mechadoll' on the cardboard backing of the Ki-94-II kit (and recorded as such at Scalemates), but not sure if that is the actual trade name. There are no decals but the castings are excellent and Kevin reckons them to be as good or better than anything since.


Crisp moulding and internal details together with comprehensive instructions distinguish the Tachikawa Ki-94-II kit shown above, released during the 1990s. RS Models issued a series of limited run injection molded plastic kits of this type from 2006 with the most recent re-release featuring decals for three spurious  operational schemes last year .     


The Mitsubishi Ki-83 kit appears to be an equally impressive product, the colour photos revealing a good looking model of a very attractive twin-engined fighter design. MPM released an injection molded plastic limited-run kit of the Ki-83 in 2000 which was re-released in a 'High-tech' version by Special Hobby in 2008.  

With special thanks to Kevin for providing these images and details of the kits. 

Image credit: All © 2020 Kevin Bade.


Thursday, 28 May 2020

Friendship Scale Models 1/72 Ki-59


Following previous retrospectives in November and December 2019 about the late Horatio Hernández of Mexico and his pioneering line of Friendship Scale Models resin and vacform Japanese aircraft kits, Kevin Bade has very kindly shared these images of an unbuilt 1/72 Kokusai Ki-59 kit from his own collection. This was Horatio's first release as Kit FSM-001.


Kevin purchased this kit direct from Horatio in 1994 together with the Tachikawa Ki-77 and Kawasaki Ki-78 kits. He found that all of them were very well done with good decals, instructions and historical notes, presenting thorough, high quality products with vacuform parts as good as any he had ever seen and good resin casting too.    


The quality and completeness of the kit as a first release is self evident from Kevin's photos, with the main components shown on two vacform sheets, together with separately bagged resin moulded detail parts and vacform transparencies. The decal sheet looks excellent and the instructions, exploded view, plans and especially historical notes are of an exceptional standard.  


With very special thanks to Kevin for providing these views of a very rare kit in its pristine and as bought' condition. 

Image credit: Heading photo © 2019 Guillermo; Kit photos © 2020 Kevin Bade

Saturday, 16 May 2020

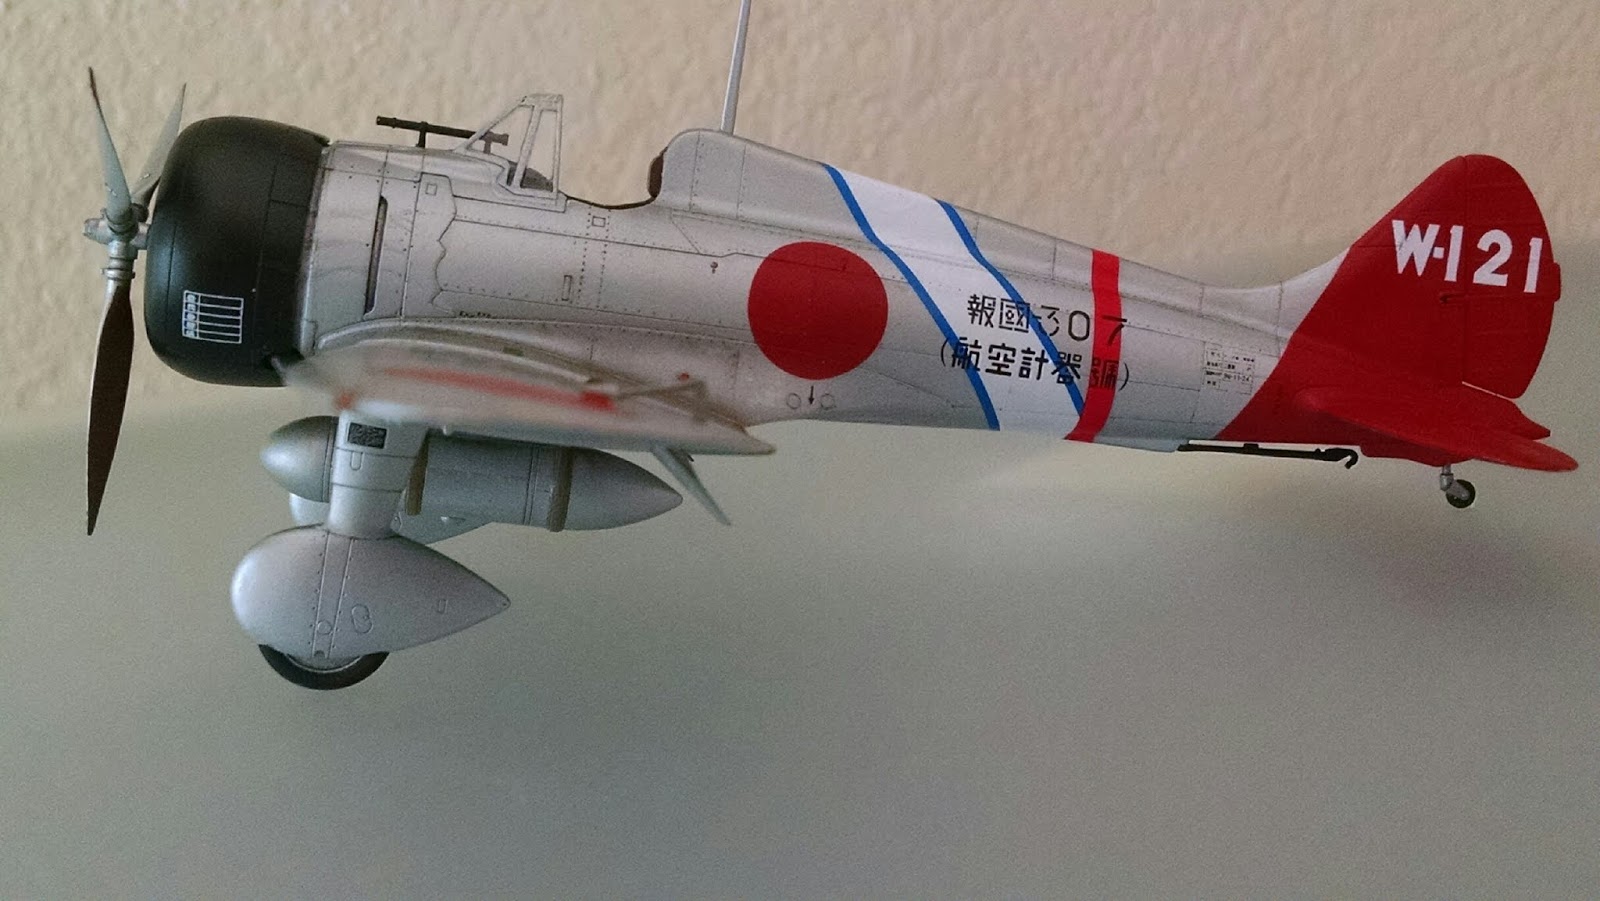
Mark Smith's 1/48 Mitsubishi A5M4 'Claude'


Aviation of Japan's Texas correspondent Mark Smith has very kindly shared these images and a very useful build report of his stunning Fine Molds 1/48 scale Mitsubishi A5M4 'Claude' - Type 96 Carrier Fighter (Kyu-roku Shiki Kanjoh Sentoh-ki -九六式艦上戦闘機), popularly referred to as 'Kyu-roku Kansen' (九六艦戦). This kind of detailed 'build chat' is rare these days but used to be a staple of the older modelling magazines and it is refreshing to be able to enjoy again.  Over to Mark then:-

"After many years without a new tool A5M4 Claude kit in 1/48 and within the space of a few months in 2017 modelers had a choice between excellent examples from Fine Molds (FM) and a new company, Wingsy.  It was great news on all fronts: each has its advantages, and both build into convincing replicas. 


"The Wingsy and FM kits both have excellent detail where it matters most: the cockpit and that big radial Kotobuki engine.  With its inclusion of photoetched details, Wingsy’s cockpit is better and more accurate, if a little more trouble; Wingsy’s surface detail was a revelation, superior to FM’s effort as well, and its canopy has less optical distortion in that topmost pane with all the corners.  My goal when I selected between them, however, was the simplicity of the build.  For that reason I chose Fine Molds because after dry-fitting the engine and cowl assemblies of both kits, FM appeared to have a clear edge in this area for design and fit.  


"One way the FM kit is different from ‘old school’ molds is in its limited mating surfaces for several assemblies; in playing with their Karigane / Ki-15 Babs kits, released not long afterward, the same approach is apparent.  It’s a trade-off that comes from the very fine tolerances necessary to mold parts to ‘scale thinness’ - so that complex assemblies like engines and cockpits, and the spatial arrangement of their elements, can be represented more faithfully.  Ironically, part of the challenge stems from their exact fit, something about which few builders complain.  Often the seam between dry-fitted parts looks like a panel line, even to the point of matching those surrounding it.  I used Tamiya Extra Thin Cement to glue parts together, but in a couple of instances finding a good place to put it and ensure a secure join without fouling that uniform ‘panel line’ was difficult, since the gluing surfaces are often tiny.  I had to redo things in a couple of places.  Wherever the builder can back up such a seam in an out-of-sight place with Gator’s Grip or a similar flexible glue, is worthwhile.  This includes the fuselage top decking between canopy and cowl; the separate cowl flaps (the circular manifold directly beneath is commendably faithful but leaves hardly any room to secure them); the three-piece engine cowling stuffed full of guns and powerplant, and the cockpit assembly.  These areas require much careful handling in building and detailing.  They are not robust assemblies, especially the cowling and powerplant, and it’s worth shoring up parts from the inside wherever possible. 


"The pattern of the wiring harness, not always quite symmetrical, was largely modeled on Russian photos of a captured Claude, and three other Japanese photos that helped provide some info.  The harness was fashioned from soldering wire, which is great stuff for any kind of bend, holding shape, and accepting paint.  It looks busier than most single-row radials because of the bracing that was bolted out in front of the cylinders, and the air scoops between cylinders at ten and two o’clock.  I’ve noticed similar cowl bracing on British types of the same period, like the Blenheim and Hampden.  Maybe it kept vibration down enough for the pilot to retain his fillings!  The braces ran from the reduction gear housing to the inner edge of the front cowl ring, so had to be installed last.  I stole this photoetched piece from the Wingsy Claude, the only piece of it I’ve used, as the Fine Molds kit omitted it. 


"I prefer to be able to work on the cockpit sidewalls separately before the fuselage halves have been joined.  Building a shell like this to fit into the assembled fuselage from beneath, where the ‘sides’ are just the longerons and ribs, is not as enjoyable.  It’s not a bad as building a ship in a bottle, but unfortunately it might be good practice.  It also limits the chance to easily add certain details if wished.  It’s not a new approach anymore, though, and both kits use this method.  To FM’s credit the stringers and ribs fit flush, though they look heavy for the scale.  Those Russian photos that once appeared online included some flash-lit cockpit shots that, if not comprehensive, are excellent, looking like they were taken at Grumman or Douglas!  (Or maybe they were indeed comprehensive, and I’ve only seen a few).  


"Even without a cockpit enclosure, the interior ends up tough to see easily, except for the seat with its adjustable bracket, and some of the cockpit floor area (synonymous with the upper wing). The instrument panel is well inset under the coaming, and the sidewalls slope out of vision.  For me, hough its basic form carried through to the Zero cockpit, Claude’s office is not as inherently busy or interesting.  The most obvious payoffs to improve the kit here are the beautiful aftermarket Yahu instrument panel, the addition of a seat harness, and an improvement to the clunky-looking molded-on throttle assembly.  The Yahu panel is a light bluish green or turquoise that puzzled me until (and this is just a guess) I noticed the old Maru Mechanic #28 cockpit painting of Claude.  It was this artist’s style to vary colors significantly to express light and angle, and this may have been an extreme example; in any case I was able to repaint it in Mitsubishi Interior Green by dropping some thinned Elmer’s Glue in the recessed dials before re-spraying the panel, which preserved those lovely dials.  I didn’t feel like detailing the area behind the seat, somewhat visible through the oval opening in the bulkhead, so placed a fine mesh screen some distance behind the bulkhead - the one with the oval opening - backing the seat.  It’s a cheap dodge, but I may resort to it again!   Oddly both kits omit all the various equipment and structure behind the seat, unlike the Tamiya newer-tool Zero 22 and 52 kits.


"Take care with fitting the seat and its bracket, as the join is iffy.  Within that oval cockpit opening, misalignment would be distracting.  After test-fitting, hey, I got that one right.  Next day, however, I couldn’t find it anywhere.  I combed the workbench, rifled all the little boxes in the big box . . . then I saw something green on the floor. The coveted assembly. Somebody had stepped on it, and misalignment was the least of its problems.  This moment brought to you by Ambien.  Know your window.


"After a rebuild session for the seat and bracket, main parts fit very nicely and did not require filler except for ‘operator error’ in a couple of places, which happened when I dropped the model from two or three feet while painting it on the porch; epic fail for the coat-hanger jig.    With a new airbrush and a new bottle of Alclad II, things were going so very well until they weren’t, when the airbrush started spitting grainy paint.  I rotated the model to see how much of it was affected, and plop, onto the deck.  Much of it had to be sanded back to primer, and what had to be redone is mostly in Tamiya Bare Aluminum, which I liked a lot – but like the Alclad, whew, the fumes.  (Timothy Leary’s dead.  No no no no . . . he’s outside, spraying Alclad).  It’s hard to know for sure which Claudes might have had an ‘anodized’ finish with a slightly golden or yellowed metal surface.  I had not made up my mind about that decision until these airbrushing difficulties, but afterward decided to leave well enough alone.      


"I think the superb Lifelike Decals used were critical to the model’s final appearance.  They came from Sheet # 2 of their 1/48 Claude trio, and depict W-121, an aircraft from carrier Soryu, a real clothes-horse, date uncertain.  As usual, proprietor Keishiro Nagao’s notes unpack his ‘best guesses’ and the rationale for such, when certain details can’t be absolutely verified, listing all the sources and their page numbers for each aircraft on every sheet.  For those who cannot read Japanese, what a benefit, and a standard to emulate.  The maintenance stencil on the cowling’s left side is not called out; it’s from another Lifelike Claude sheet, and provisional on my part.  The only known photo of W-121 is a profile view of the right side, and I like the look.  As finely printed as they are, these decals are easy to position and tough enough to stay intact when you get things wrong the first two or three times!  They responded well to Micro Set.  I sprayed the tail with Tamiya Flat Red, which was also used for the hinomaru, as I wanted the two to match.  With a semigloss coat, I like the shade.  I toned down the brighter red of the fuselage decal stripe with red-brown pastel powder to bring it a bit closer to this shade (the closeup photo of the razor-sharp Houkokou inscription across the fuselage shows its original brightness). 


"Dead Design masks were used for hinomaru, canopy framing, and wheels.  Those are wonderful products as well, and they fit.  Buy and use them with confidence.  I’ve been underwhelmed by the aftermarket response to the Babs and Claude releases from larger companies like Eduard and Aires, which to my knowledge have so far completely ignored both the Fine Molds and Wingsy Claudes  Modelers of 1/72 and 1/48 Japanese aircraft owe a debt of gratitude to companies like Lifelike, Dead Design, and Rising Decals who provide some alternatives for easier building.  Keishiro, Jan, and Mirek combine passionate research, knowledge, and expertise to bring us some very specialized items. Why should Luftwaffe modelers have all the fun?     

                       
"After decal application and another clearcoat came surface effects with watercolors and pencil, along with some pastels here and there.  Fine Molds’ panel surfaces have slight contrast in their sheen.  Seen in oblique light, on bare plastic it makes a lovely and subtle effect.  I don’t know how one might preserve it throughout the painting process, as doing so would certainly enhance a natural metal or anodized finish; I couldn’t.  The panel line detail is not too heavy-handed, and riveting, where present, is quite nice, but FM is mean-spirited with it, as if they started but decided against it – you just get a few in certain spots, the most concentrated in the bottom center wing.  The Wingsy parts, however, like their Sonia, are quite evenly and finely riveted across all surfaces, with finer panel lines than FM as well.  It made me wonder which kit I should have started! 


"I thought I would try to add rivets in a few places with a Staedtler mechanical pencil, sharpening it during the process by rolling its point on a pad.  “A few places” got away from me after I decided to emphasize wear at the wing roots and couldn’t fade it back as planned.  Easier imagined than executed.  After I enlarged the canvas for it, the problem was consistency: it would look so nice after a certain evening’s work . . . until for some mystical reason I couldn’t do it neatly the next.  It’s forgiving, however, and those little Tamiya cotton swabs, just damp, will remove it easily.  It must be sealed at some point with an overcoat of course to withstand handling.


"Most importantly, I finished it before I dropped it again – that’s the key.  And as often as I was disappointed with something along the way I like the result, which came from reminding myself that if I could only get it in the display case, those things soon wouldn’t matter much.  And they didn’t.  Thanks to Nick for the chance to share it here, which was also a spur to getting it done.  The model is dedicated to a matchless friend for four decades, Mike Quan, who passed away earlier this year.  I miss you already, Mike."    

Mark Smith
                  
The carrier Soryu carried 18 Type 96 Kansen in two Buntai (divisions) of nine aircraft each, the first commanded by Lt  Tamotsu Yokoyama (W-101) and the second by Lt Muchifumo Nango (who from March to July 1938 was also acting Soryu Hikotai leader).  From April 1938 one Soryu Buntai was detached to operate from land bases in China and in July 1938 became the fighter cadre for 15 Ku. The regular pilot of W-121 is unconfirmed (but may have been Lt Kiyoyo Hanamoto who was the 2nd Buntai leader from December 1939 to October 1940), although other aircraft of the unit were flown by such notables as Petty Officers Matsuo Hagiri (W-102) and Hideo Oishi (W-103). The 'W' tail code was carried from December 1938 to November 1940 and the donation ceremony for Houkoku-307 was held on 7 August 1939 at Haneda, Japan. In September 1940 after a period of fleet exercises Soryu returned to blockade operations off the south coast of China, cruising between Hainan Island and Amoy (now Xiamen), a strategic port in Fukien (now Fujian) province opposite the Taiwan Strait.  

With special thanks to Mark for sharing these images of his superb 96 Kansen and the build report.   

Image credits: All photographs © 2020 Mark Smith