Showing posts sorted by relevance for query D3A1. Sort by date Show all posts

Wednesday, 10 February 2021

A 1/32 scale Aichi D3A1 'Val' from Infinity Models

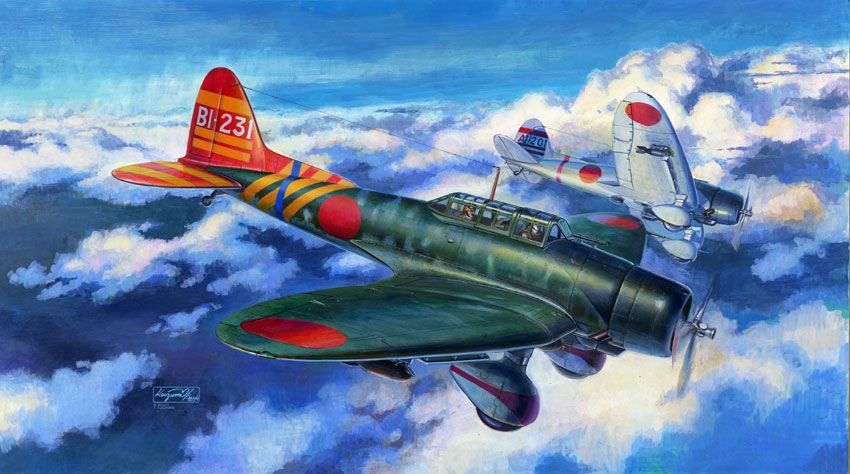
I'm very grateful to several correspondents for alerting me to news of this kit at around the same time and apologise for the time it has taken to mention it here. My thanks to all of you who very kindly sent me emails about it or mentioned it in other emails. The kit has not been released yet but details and progress may be found on the Infinity Models webpage. That suggests that there will be at least two markings options, for the well-known and colourful B1-231 of Lt Cdr Takashige Egusa (although uncoded in the website profile) from Soryu and the overall grey houkoku-adorned AII-256 of Flyers 4/c Shinsaku Yamakawa and Katuzô Nakata from Kaga. The aircraft depicted on the box art is another grey or perhaps slightly greyish-green (!) E1-231 from Shôkaku - all being Pearl Harbor attackers.

Regarding the colour of 'Val', over the years the late and sadly missed Jim Lansdale shared a wealth of valuable paint colour data at j-aircraft.com and via email from various actual D3A1 relics. Broadly speaking those all fall within a category of a warm to distinctly brownish amber grey, with somewhat fugitive greenish undertone, the wartime appearance of which was probably not that far from the box art depiction of EII-233 from Zuikaku for the 1970s Bandai 1/50 scale D3A1 kit (shown below). More precise colour presentations for 'Val' closer to release.

The Infinity Models kit will build into an impressive model of 'Val' with a wingspan of just over 17.5 inches and a length of just over 12.5 inches, but it doesn't appear to have an option for folding wing tips!   

Also being re-released in the autumn is the venerable 1/72 D3A1 kit from Airfix, (original box art by Roy Cross above), unfortunately not (it seems) a new tool to accompany their more recent A6M2 and B5N2 for the 80th anniversary of the attack on Pearl Harbor. What a pity because none of the currently available 1/72 kits of 'Val' are without issues. The three box arts shown here usefully present the three main and competing perceptions of D3A1 colour.

Image credit: Infinity Models box art © 2021; Bandai box art © 1970s; Airfix box art © 2021

Saturday, 26 April 2025

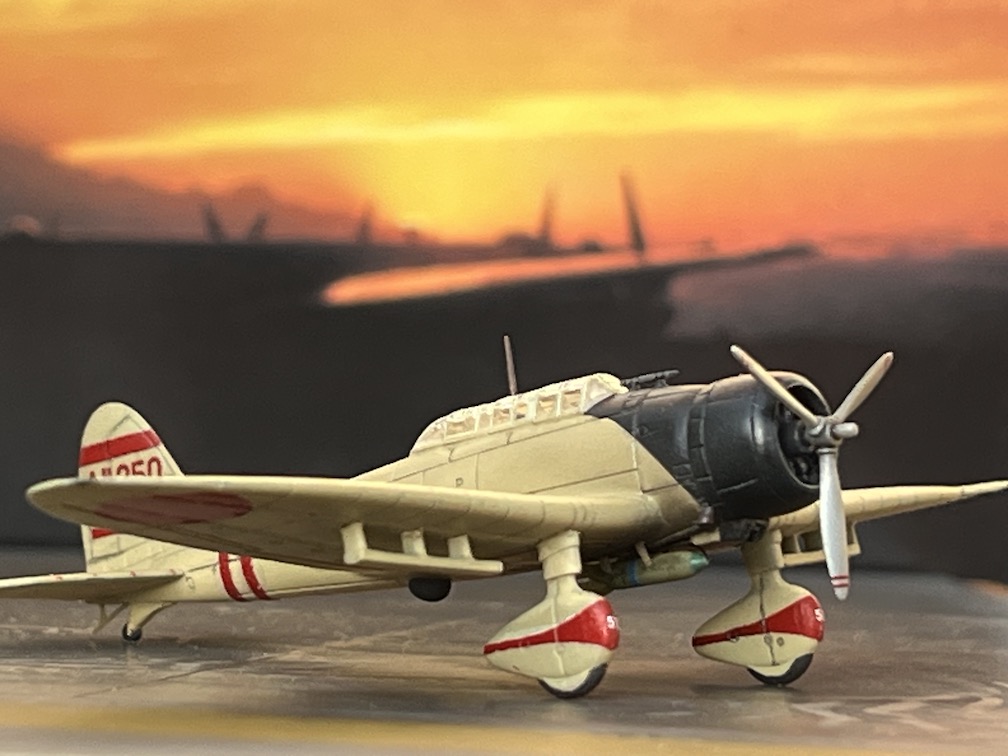
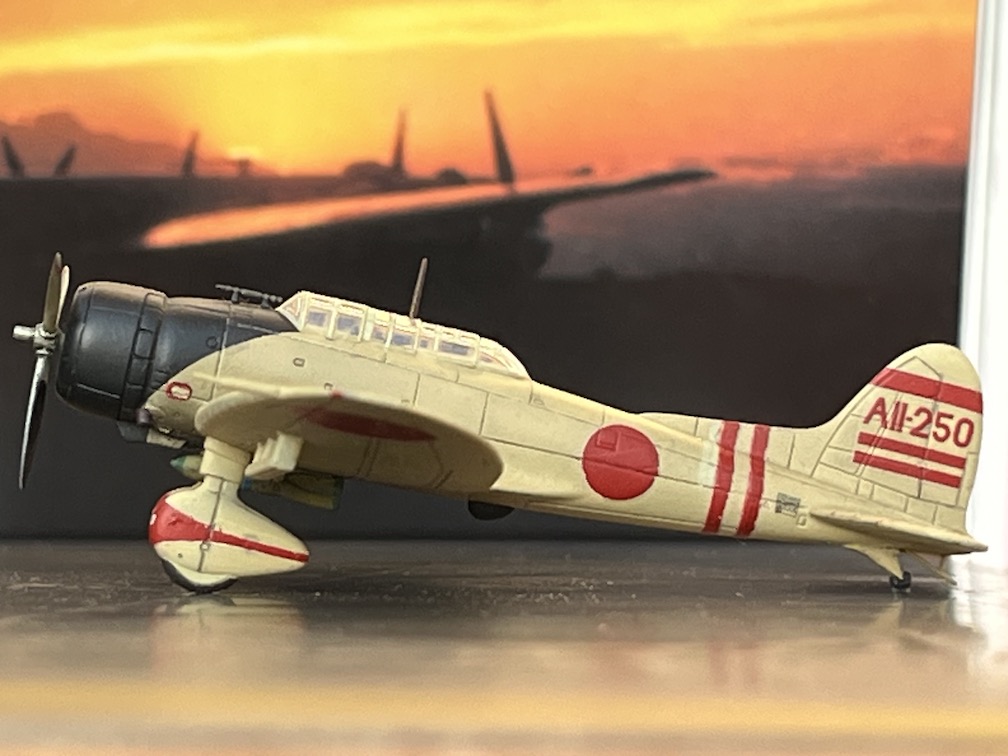
Aichi D3A1 'Val' in 1/144 Scale by Mark Smith


The first of two 1/144 scale features by Aviation of Japan Texas correspondent Mark Smith. this one presenting his build of the Aichi D3A1 'Val', Type 99 Carrier Attack Bomber (Kyu-Kyu Shiki Kanjoh Bakugeki-ki  - 九九式艦上爆撃機 or in short Kyu-Kyu Kanbaku - 九九艦爆). There has been a resurgence of interest in kits of this scale with a greater variety of types available but this one appears to be hard to find. Over to Mark then:-


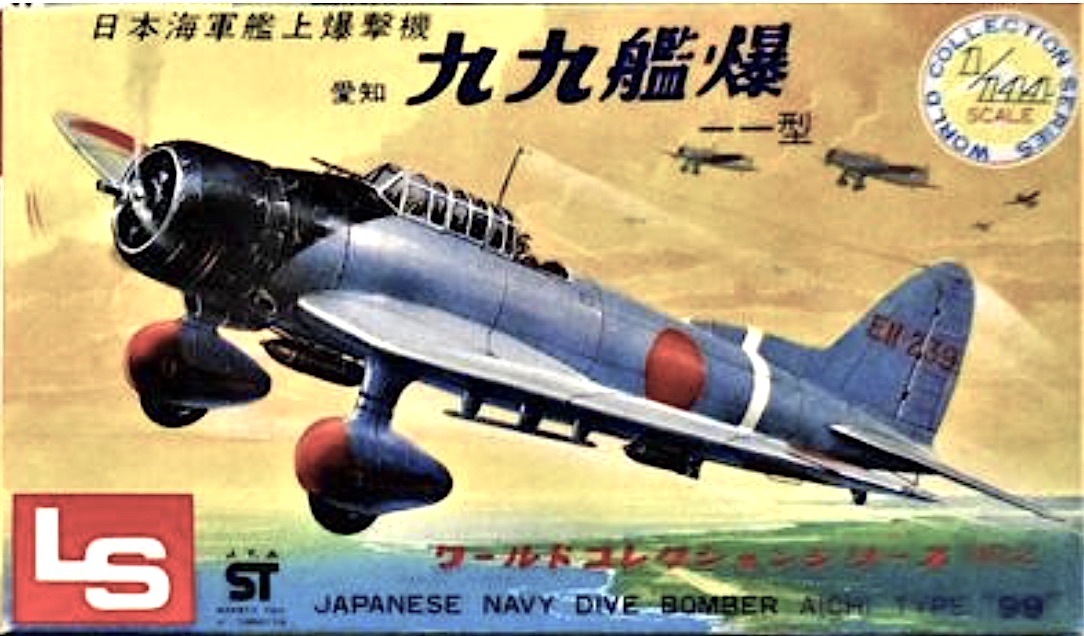
'In 2005 Monochrome released a very welcome kit for 1/144 modelers of the Aichi D3A1 'Val'.  There had been a couple of kits in the scale which took a stab at the type, including an LS kit from over 35 years ago, but this one was streets better. Its details, especially considering the scale, were superbly rendered, with the exception of the laughably thick dive brakes and overwrought panel lines. But those brakes could be scratchbuilt, I thought. These came with two kits in the box, with attractive decals a little spoiled by hinomaru that were too orange. So I found MYK decals that looked much better. I couldn't read the Japanese instructions for them, but decals are decals, right? 


'Well sort of, it turned out.  The MYK decals were intended to have the carrier film gently removed after 24 hours, either with the tip of a blade or low-tack tape - a concept that works, but I knew nothing about it, and they curled up with handling in ways that I made worse trying to repair them. If knowledge is power, ignorance is trouble, and the build suffered, needing retouching, especially of the fuselage stripes and tail, which I had made worse. Eduard later used a similar type of decal, which some love and some hate. There are English instructions for the MYK decals now available online, which were also included in the instructions of their later releases. MYK decals are much harder to find now and often prohibitively expensive online - when one can find them. The earlier WWII Japanese ones have become quite rare. 


'This has one of my best cockpits in a model, as the kit gives a decent start and I had lots of info to try to approximate the rest. I had planned to open the pilot's canopy, but for some reason, I just couldn't pull a tight vac-formed copy of the canopy with clean edges, so used the over-thick kit canopy. In keeping with the rest of the project, I planned to use decals strips for canopy framing, but the same paint had a very different appearance when applied over the clear Monochrome plastic. Between this and the mess I made with the kit decals, I was discouraged with the project, and only finished it much later, sticking the terrible dive brakes on and calling it finished. However, I still like this model because the shape looks like a Val, a remarkably attractive design. And it's proof that it is better to finish an abandoned project than to abandon the project. And hopefully, encouragement to sooner or later build another and better one. 


'I'll close with a mystery. I opened by calling this a welcome release in 2005. But it immediately disappeared. If my old college roomie and modeling buddy P F Simmons hadn't presented me with the kit I would never have seen it. Then when I tried to get another from the same place where he found it, or any other place for that matter, no joy. Finally in the last few years, two friends who knew of this frustration found one for me at model shows, though not cheaply. While Trumpeter picked up the 1/144 Mavis and F-86 that Monochrome first released, the Val came and went very quickly, and looking at that invaluable site Scalemates, it notes only the 2005 release/boxing. Why it became a rare kit, I don't know.  There are only so many railroad or maritime accidents involving kit molds to go around :-)'


Mark Smith 

With special thank to Mark for sharing these images and notes. The Monochrome box art for the kit  is shown above. The relationship between Trumpeter and Monochrome for some kits seems obscure as to which is the 'chicken' and which the 'egg'.  In addition to the LS kit mentioned by Mark, shown below and later released as a double kit with the Aichi B7A2 'Grace', there was also a Crown kit issued in 1975. The Crown kit - and others - had originally been devised by Ikko-Mokei but were never released under that brand name and in 1979 were taken over and re-marketed by Arii. A D3A1 kit # H-1002 was also included in the Revell (Japan) 'Mini Series' range of 1/144 kits circa 1975 previously featured in the blog here. Not having seen an example of this kit I do not know if it originated from one of the kits described above.


Mini Series 1/144 D3A1 from Revell (Japan) Catalogue 1975 

Image credit: All model photos © 2025 Mark Smith; Box art © Monochrome, LS, Crown, Arii & Revell (Japan)

Sunday, 8 September 2013

The Curate's Egg ~ Dragon's 1/72nd Aichi D3A1 'Val'


Despite its recent re-issue the Airfix D3A1 kit has long been relegated to the Temple of Modelling Sneers (although we like it here in Schloss Straggler*) and in some quarters the 1/72 Fujimi kit joins it there (but we like that too in our unreconstructed way). Thus much optimism sprang from the fanfare announcement of a new-tooled Dragon of Hong Kong Golden Wings Series Aichi Type 99 Val in the divine scale, tempered slightly by their reputation for odd errors and outrageous prices. The 'Midway 1942' re-issue is currently £34.99 from Hannants (aber was denn!) but only about £14.43 direct from Japan. 


The impressive box art on the Dragon kit is by Masao Satake, well known for his monochrome Famous Aircraft of the World (FAOW) cover art. The kit offers no less than eight Pearl Harbor markings options but depicts them all as grey - very grey - and not the distinctively amber or mustard grey of the original aircraft so excellently depicted by Eric Bergerud on his 1/48th scale Hasegawa D3A1 build here. The red of the Hinomaru appears a bit light on the kit decal sheet which is protected by its own re-sealable bag - a nice touch. The recent Midway 1942 issue contains options for four dark green aircraft and although I haven't seen it I understand from Mike Quan that it has not been revised in any way and contains identical parts to the kit described here.


Eight markings options in the Dragon kit

The kit decal sheet in 5045

Without going into rivet counter mode with a micrometer and painstaking comparison of panel line to panel line there are obvious problems - but there are also some impressive details not attempted in previous kits. I searched for some build reviews mainly in vain, but found an excellent Japanese article here, from which the image below is borrowed and which has further images including the cockpit interior. I note that the builder painted the markings on his model using stencils rather than the kit decals.

Dragon's 1/72nd scale D3A1 with folded and dangly bits

As the linked article demonstrates - all is not lost - but the first sinking feeling occurs soon after examining the kit parts and studying the instructions. The two appear to be related only by the most serendipitous happenstance.  The instructions show a cockpit tub with integral walls - the kit actually has fuselage sidewall detail and a separate cockpit floor with two fixed bulkheads. Although equipped with an instrument panel, machine gun breech detail and ammunition panniers the miniature pilot (sadly not included) has no means to steer his aircraft, a control stick being absent. Also absent is the prominent coaming between the pilot and observer positions which housed the Type 3 Reflector Compass on a raised mounting with a small drawer, prominent enough even in 1/72nd scale to warrant an appearance and included in the Fujimi kit, albeit quite crudely. The Type 3 was a circular compass with two angled glass graticules similar to a reflector gunsight by which the observer could view the compass readings head-up. The observer's radio equipment and instrumentation is represented by a single separate piece which attaches to the floor behind the central bulkhead. 

99 Kanbaku interior arrangement

There is an approximate representation of the equipment behind the observer's seat with scope for additional detail to be added but there is no gun or mounting. The observer's drift sight (the tubular object shown upright to the left of the observer's seat in its storage position in the above drawing) is not included although the aperture for it in the floor is and there is an accurately moulded corresponding aperture in the lower wing centre section, represented only by a crude, semi-recessed circle in the Fujimi kit. Both kits include the RDF loop fairing as a separate part. The omissions in the Dragon kit are fairly easily rectified but at the price they really shouldn't need to be. Even the sprue layout diagram conflicts with the parts actually provided showing different numbers to those on the sprue frame and two mysterious large pieces that baffle comprehension.
    
Dragon 'C' Sprue with optional cowlings, engine, prop & other small parts ~ 
note the fine details including ring sights

The engine in the Dragon kit is separate and moulded in two parts, quite reasonably, whereas it is just a half-moulding in the Fujimi kit. There are separate exhausts but their location is not very clearly shown in the instructions. The under cowling intake moulded integrally with the lower wing has the correct split configuration but the inner side of each trunk has no wall and is left open. The central bomb crutch detail is impressive but the two parts are numbered C20 and C26 in the instructions but C23 and C30 on the actual sprue frame - a recurring theme. The large central bomb is in three parts, the bomb itself, one pair of separate fins  and one piece representing the fin struts. Wing racks and bombs are also included with one pair of integrally moulded fins and one separately moulded pair for each bomb. The dive flaps have separate mounts which look like they might prove fiddly to install. The wings can be displayed folded and the flaps deployed which accentuates the wing expanse of the original aircraft. However all of the control surfaces have rather crudely moulded and overscale ridges supposed to represent ribs which will need sanding down at least.

Separate control surfaces in the Dragon kit ~
but with ribs and/or rib tapes crudely represented and over scale 

The canopy can be displayed open, which is just as well because it bears little resemblance to the D3A1 and is more like the D3A2 in appearance. It is under scale with an exaggerated section by section tapering towards the rear that is nothing like the original. What is strange is that the canopy appears more or less correct in the advertising presentation shown above. The canopy is probably the single most unredeemable issue of the whole kit and unfortunately the error extends to the cockpit aperture. 

Comparison of Fujimi and Dragon canopies - yikes!

Comparison of Dragon and Fujimi cockpit apertures 

Both the Airfix and Dragon kits have separate wheels and spats with the latter incorporating "flats" to suggest weight. Fujimi moulded the wheel integrally with each spat half. Both the Dragon and Fujimi undercarriage legs incorporate rake back whilst the Airfix kit depicts them aligned vertically. Comparing the kit parts to the 1/72nd scale plans in FAOW 130 (2009) the Fujimi spats appear to be reasonably accurate, the Dragon spats are under scale with slightly exaggerated rake back and the Airfix spats are set at the wrong angle and too elongated to their rear.

Wheel spats compared!

Comparing the main fuselage profiles to the FAOW 130 plans both the Dragon and Fujimi parts appear reasonable in shape if not perfect, so the Dragon kit does not appear to be under scale per se. However the Dragon fuselage is about 2mm too short in the area from the cowling flaps to the windscreen. The wings of the two kits appear generally ok in span and shape but the wing fold of both appears to be 5mm inboard of where it should be. This inboard position tallies with earlier plans in FAOW 33 (1992). The anomaly is quite difficult to understand because both books contain construction plans from the original manual. Does it matter? Probably not (Heresy! Burn the Witch!).

Comparison of the Dragon and Fujimi wing and centre section under surfaces ~ 
the Dragon kit has finely engraved panel lines and where appropriate indented rivet detail 

For those now contemplating a preference for the Fujimi kit there is a nicely built and photographed example from a Japanese website  here (as shown below) with build report here. And there are other reviews here and here. Recently its low price (£5.15 in Japan) made it a potential contender for cannibalisation, although  the canopy, whilst a more reasonable shape than Dragon's, is single piece and not especially thin. The Fujimi kit is currently shown as discontinued but will probably be re-issued at some point. If you already have one in the stash don't discard it! It will be a miracle if Hasegawa or Tamiya kit the type in 1/72nd scale.

Fujimi's 1/72nd scale D3A1

Conclusion

The apparent lack of modelling popularity of the Aichi D3A compared to the B5N 'Kate' was mentioned in the previous blog and is perhaps all the more surprising as there is a very fine English language monograph on the type by Peter C Smith in the generally very good Crowood Aviation series (The Crowood Press, 1999), something the B5N does not presently enjoy. Whether it is that lack of popularity or the jungle telegraph reputation of Dragon kits - or both - that has led to so few builds appearing online is a mystery to ponder.

Is the Dragon kit worth it? Well that really depends upon your enthusiasm for the type and whether you can obtain one at a price that suits your wallet. There is little doubt the kit has flaws in shape and dimensions which is disappointing in view of the fact that the detail is generally superior to the Fujimi kit and makes the Airfix kit look as if it was carved from soap. Apart from the instruction errors the worst and most glaring flaw is the cockpit aperture and canopy. Rob Taurus do not appear to have a replacement D3A1 vacform canopy in their range but Falcon produce a set that includes a replacement canopy intended for the Fujimi kit and that could perhaps be adapted to fit the Dragon kit. The features that are better than in previous kits are the surface detail and small parts, the engine and prop, the nice but irritatingly incomplete interior, the ordinance and racks, the folding wings, the positionable wing flaps and the cowling flap options. All three kits fail to depict the precise shape of the fin leading edge extension but that is not too noticeable. With a bit of work on the Dragon kit an impressive looking model can still result as the Japanese modeller linked above demonstrates.


Sanitised box art from 1980 when the burgeoning "ban everything" industry
forced Airfix to pretend that WW2 did not involve violent destruction and death

More Heresy

So how does the much-maligned Airfix kit stack up in terms of overall fidelity of shape? Well, apart from the spats and copious rivets it is a little short in wing span with the tips too tapered and therefore too narrow in chord. The rudder is also a little too narrow in chord. The forward cowling rim is slightly anaemic but nothing to write home about. The RDF loop fairing is not represented at all. The cockpit detail is limited to two identical and inaccurate seats secured to pins. The canopy parts, which appear to have been cleaned up in the latest re-issue, are more accurate in plan than the Dragon canopy. The tailplanes are pretty much spot on. Interesting that the box art of the re-issued kit appears to faithfully reproduce the kit spats rather than the real thing. Thus builders without D3A references will be perfectly unperturbed.

Is it, in the vernacular, a PoS? Not really, given the context of its age and the state of kit engineering at that time. My assessment of 5 years ago, that it is essentially "simple, unpretentious and honest" has not altered. I've built it several times, without fretting too much over its minor inaccuracies and 1960s detailing, and have always enjoyed the experience. Improving it in various ways without too high an expectation of the end result is both fun and very satisfying. Some of the barmier flights of my fancy have involved a Graf Zeppelin based example in German markings and a licence-built Royal Navy Fleet Air Arm example (the Anglo-Japanese Naval Alliance never ended) with a Bristol engine (the Airfix crew redeemed). And it always looks good hanging from the ceiling in a simulated dive... 

* laters!

Image credits: Dragon kit box art, advertising feature, markings schematic & decal sheet © 2011 Dragon Models; Built Dragon model image © 2013 http://waterline.sakura.ne.jp/d3a1.html; Built Fujimi model image © 2013 http://rockriver.marubun.ddo.jp/1C411.htm ; Airfix box art © 1980 Airfix Products Ltd; Photographs of kit parts - author 


Thursday, 11 March 2010

Recent Risings

Rising Decals continue to issue sheets of interesting Japanese subjects, and long may they continue. They have proven to be innovative and frequently fill gaps in the availability of alternative Japanese markings for the many new kits that have been released over the last decade. Another aspect I like about them is the colour chosen for the Hinomaru; personal taste I know but I much prefer their deep, saturated reds to the more orange - or even pinkish - roundels from some manufacturers (the images of the sheets shown here are lighter than the actual colour). The colour instructions are always clear and well presented and I admire the way that the paint colour information is offered with a qualified caveat rather than dogma. Another very positive aspect is the posting of correction colour scheme information on their web page.

'Japanese Carrier Bombers', RD48008, is a 1/48th scale sheet with markings for two early China-based B5N1 of the 12th Kokutai, a B6N2 and a D3A1. The two B5N1 represent the pre war silver and red scheme for a Hokokou ('Patriotism') adorned bomber and a field camouflaged scheme of green and brown which retains the red tail feathers. Interestingly, both aircraft have the same tail code. Was the Hokokou presentation marking overpainted? Dunno! The 551st Ku B6N2 51-301 has large white characters either side of the Hinomaru and a yellow striped tail - an impressive scheme for an aircraft not known for its colourful options, so very welcome. The D3A1 ia another Hokokou adorned aircraft, AII-256, from the carrier Kaga in the early "grey" scheme. The Hasegawa kit, also released by Revell, probably takes the biscuit but for those worried by rising prices (no pun intended) the earlier and cheaper Fujimi offering still seems to be readily available and is a good kit. A D3A1 model lends itself to imaginative presentation, always appearing more impressive posed as in flight, diving with dive brakes open, pilot bent forward peering through the optical sight and bomb cradle swinging down. Standing, tail down, with those mighty pants, always seems to diminish this charismatic beast. The D3A1 also offers the opportunity to experiment with many and varied interpretations of the early "grey". This sheet includes all the markings necessary for three aircraft, including the Hinomaru.

The next sheet is, for me, the most welcome. 'Japanese Aircraft of Training Units', RD 72026, continues Rising's tradition of exploring the many and varied training schemes with a colourful selection of 1/72nd scale decals for IJN trainers, including the K5Y1 "Willow" in land and float configurations, and two A6M2 aircraft. A bonus provides additional markings for the A6M2-K two-seater Zero trainer and K3M3 crew trainer, recently released by AZ Models. The two A6M2 aircraft from the Oita and Tsukuba Ku, with yellow undersurfaces and one with a stripped tail cone, are particularly welcome. Both have large underwing codes and the Tsukuba example has an undulating fuselage paint demarcation that should prove a challenge. The "Willow" has a plethora of schemes that could be applied to the recent Valom kit or the older LS example still available from Arii. Silver with red tail feathers, yellow with red and three different examples of field camouflaged dark green over yellow schemes, including an interesting "snake weave" pattern I have not seen before. The only aspect of doubt about this sheet - and it has nothing to do with Rising - is the availability of a good 1/72nd A6M2-K kit! There is the AML example, a challenging build if you can find one so I'm told, the rare as hen's teeth Gartex resin, a CMK resin conversion for the Hasegawa Zero (which Rising recommend) or the do-it-yourself kit bash. It remains something of a mystery why, when they released their new generation Zero series (how long ago now?), Hasegawa did not take the opportunity to mold an alternative A6M2/5-K fuselage frame and canopy.

Finally, also in 1/72nd scale, 'A5M4 Claude', RD 72027, is a small sheet offering three markings options for this Navy fighter. Two are very colourful aircraft from the carriers Soryu and Hosho, whilst the third is a plainer looking fighter, S-123 from the Chitose Ku at Rabaul early in the war. This latter scheme is interesting in offering a Pacific War Claude but I'm not sure about the colour information here. Natural metal is suggested but I believe the finish chronology for the A5M may have been natural metal only on the earliest examples, followed by aluminium - or silver - paint, followed by the "grey rat" coloured paints for light metals. The instructions offer a useful suggestion for the legendary "golden cast" finish on the A5M should the modeller wish to go that route, by first spraying silver (Mr Color # 8) followed by a mix of 95% clear dope (Mr Color # 155) and 5% yellow (Mr Color # 58). In the case of the Soryu aircraft decal bands are included to aid with painting the blue wheel spats and the FS value for the decals is included (*5190) to assist in obtaining/mixing the correct colour paint. Bearing in mind the white and blue borders on the spats and wing bands this is probably the best approach. A very colourful gem is sure to result. The various Fujimi kits of the A5M4 are excellent and generally available, whilst the older Nichimo A5M4 kit also has a certain chunky charisma and these decals would certainly dress it up.

An excellent and highly recommended selection of decals. Rising's next Japanese projects look set to continue this trend for unusual, colourful and much needed markings. Thanks to Mirik of Rising Decals for the review samples.

Images credit: © 2010 Rising Decals


Sunday, 7 December 2008

D3A1 Kits - 1/72nd Scale


There have not been many 1/72nd scale kits of Aichi's D3A, which is perhaps surprising given its effectiveness as a maritime dive bomber in the early years of the Pacific War and its charismatic appearance.

The veteran Airfix 'Val' first appeared in 1964 and was typical of the Airfix kits of that era: simple, unpretentious and honest. Markings for a single Akagi dive bomber "A1-201" were included but the tail code was depicted in black, as was the paint-it-yourself trim on the wheel spats. The distinctive sweepback of the blue-black anti-glare was not observed, the artwork and instructions depicting only a black engine cowling. It was re-issued several times with the same markings, but most recently in 1997 with improved markings options. These provided an additional option for Egusa's colourful green camouflaged and red-tailed "B1-231" from the Indian Ocean operation (although captioned as being from the Pearl Harbor attack on the instruction sheet) and now offered the black wheel trim for "A1-201" as decals.  There are some concessions to accuracy, most noticeably in the 'sit' of the spatted undercarriage, and simplified details, but it has a lot of charisma, looks the part and can form the basis for an excellent model. Canadian modeller John Wong has shown just what can be achieved with the Airfix kit. It is still a favourite of mine and I like its straightforward build and robust, pugnacious look. A more detailed look at this kit and its box art will follow in due course.

In 1985 Fujimi issued a new D3A "family" consisting of D3A1 and D3A2 kits sharing common parts. This required some compromise in construction and a five part fuselage including a separate upper fuselage deck. Most criticism of this kit has focused on the construction problems caused by this parts breakdown but it is undoubtedly a finer and more accurate kit than the Airfix one. Molded in Fujimi's hard glossy plastic it provided markings options for two aircraft: "Yo-206" a pre-war red-tailed, silver aircraft and "A1-203" a Pearl Harbor attacker from Akagi. The pre-war silver aircraft are sometimes modelled as being highly polished natural metal, but apart from the prototype, photographs strongly suggest they were in fact painted aluminium.

Polish manufacturer Plastyk issued a D3A1 kit in 2005. It appears to be a copy of the Fujimi kit but is molded in a rather rubbery dark grey plastic with spark-eroded detail. The fit problems of the Fujimi kit have also been copied and are exacerbated by shrinkage with the upper fuselage decking being particularly problematic. The join and difference in cross section are hard to conceal without building up the lower fuselage sides. A single set of poor quality decals for the Fujimi kit's Akagi stablemate "A1-202" are included.

Recommendations. For a serious model choose the Fujimi kit, but for an enjoyable weekend build the Airfix kit will not disappoint. The curious might seek out the Plastyk clone to complete a kit collection or, if feeling brave, have a go at building it.

Image credits: Airfix (Hornby Hobbies Ltd.), 1964; Fujimi Mokei Co. Ltd., 1985; Plastyk, 2005.

Saturday, 6 December 2008

D3A1 Colours at Pearl Harbor


Japanese aviation researcher Jim Lansdale has published an exacting and revealing examination of Aichi D3A1 dive bomber casualties at Pearl Harbor at j-aircraft.com including measured Munsell colour values from extant aircraft artifacts.

The Munsell values as listed in the article are rendered above with the closest FS595b comparison value shown beneath each chip together with its DE2000 difference calculation. A calculation of 2.0 or less equals a close match. In two examples where the closest FS equivalents are poor matches I have included a comparison to 16350 but it is not the closest match. 

The first two plates show the variegated Munsell values taken from a single artifact together with the calculated average (9th chip). The third plate shows the two Munsell values cited from a visual assessment of a metal fragment from the same aircraft by Robert C Mikesh - the original colour said to lie between the two. The last value is from another metal artifact. 

As far as modelling paints go, and without going into complex mixes but allowing for scale effects, here are a few starters:

Vallejo 71023 Camouflage Beige 'Hemp' is already in the ballpark, but may require a little lightening for "scale effect".
Polly Scale F414317 or F110082 'Concrete' are also in the ballpark, but a little lighter and greyer.
An approximate Gunze (GSI Creos) mix would be 50% H70 'RLM02 Grau' and 50% H336 'Hemp'
For their 1997 1/48th scale D3A1 kit, Hasegawa suggest the following Mr Color mix: 50% #55 'Khaki' + 30% #13 'Neutral Grey' + 10% #4 'Yellow' + 10% #1 'White'
For Humbrol try adding 62 Matt 'Leather' to 40 Gloss 'Pale Grey' in a 2:8 ratio.
White Ensign Models Colourcoats ACJ17 'Nakajima Amber Grey (Ame-iro)' is a little too strong and yellow, whilst ACJ16 'Mitsubishi Grey-Green' is closer but a tad too grey. Somewhere in between these two maybe?
Revell Silk-Matt 362 'Schilfgrün' (Reed Green/RAL 6013) is perhaps a little too green but comes very close to the appearance of the Lovell sample when dry. The green of this Revell colour is subtle and only becomes apparent in juxtaposition to the browner hues.

Greg Springer has also posted a precise Testors Model Master mix for Munsell 2.5 Y 5/3 at j-aircraft.com

Many thanks as always to Ken Glass for providing the fractional Munsell notations and to Jim Lansdale for sharing the data with us.

Image credit: Rendered colour chips © Straggler 2008

Saturday, 9 May 2009

Olive Grey III


Over on j-aircraft.com James F. Lansdale has posted an interesting analysis of the paint colours found on a piece of wingtip from Aichi D3A1 'Val' s/n 3304 now preserved at the Australian War Memorial (AWM) museum. The fascinating story of this particular aircraft may also be found here including a contemporaneous painting of the crash site.

The colour values cited by Jim may be viewed in comparison to previous Aichi D3A1 colour values explored on the blog here. In addition I have rendered and added samples to that prescient box art from the Bandai Aichi D3A1 kit as discussed in the first part of this series.

Sample 1 is a rendering of the Munsell values matched to the top surface of the piece when examined in direct sunlight by a museum volunteer.

Sample 2 is a rendering of the Munsell values matched to the bottom surface of the piece when examined in direct sunlight by a museum volunteer.

Sample 3 is a rendering of the Munsell value measured from another piece of the same aircraft by Bob Alford.

Sample 4 is rendered from a digital measurement taken from a photograph and rendered colour sample of the piece, observed under museum lighting, by Michael Claringbould. Michael described the artifact as battleship grey and commented that it was "certainly not an olive grey".

Sample 5 is a rendering of the FS 595b value (FS 24424) matched to the piece as observed under museum lighting by a member of the museum staff. This person commented that it was difficult to get an exact match and that the colour "should have a touch more grey in it".

Bear in mind that the colour as observed in direct sunlight may tend to look slightly more yellow and the colour as observed under the museum lighting may look colder and more blueish. An immediate impression when comparing the first three samples against the box art is that they are darker. But try to look beyond the lightness/darkness at their actual hue. The measured values will look different viewed as they would be reflected on a full size aircraft in daylight.  The closest FS 595b value to the first three samples is our old friend 34201.

Notice also how the colour of the 'Val' depicted in the box art compares to the rendered colour samples adjacent to it - then view the original image without the samples added. I have not altered the colour of the 'Val' in any way.

The next instalment of this ramble will get to grips with the Kariki 117 colours and explore them in the context of the measured and observed values. As we do this please keep in mind those descriptions "grey rat colour" and "ash grey slightly towards candy colour"

Image credits: Rendered colour samples © 2009 Straggler; Box art © Bandai


Saturday, 20 May 2023

Notice - Detailing the D3A1 by Ryan Toews


With the recent release of the Infinity Models 1/32 scale kit of the Aichi D3A1 attention is drawn to the excellent PDF 'Detailing the D3A1' by Ryan Toews as featured in this blog's sidebar and here. Please note that this PDF is not available from Aviation of Japan but can be requested direct from the author by clicking on the 'Request a copy' link in the sidebar. If you should encounter any problems using that please email me and I'll pass your request on to Ryan. 


Image credit: Profile and box art © 2023 Infinity Models 

Monday, 22 February 2021

Detailing the D3A1

Ryan Toews has recently completed and shared a very fine analysis illustrating a number of details of the Aichi D3A1 'Val', Type 99 Carrier Bomber (99 Shiki Kanjoh Bakugeki-ki - 九九式艦上爆撃機) known as 99 Kanbaku (九九艦爆) with an important goal being to compile a list of modifications and/or additions applicable to the 1/48 Hasegawa kit. The 19-page PDF 'Detailing the D3A1' presents full text with photos, schematics and colour data (sample page thumbnail below) and is available from Ryan on request. A direct link for requesting this PDF has now been added to the sidebar below the blog archive. 

With special thanks to Ryan for sharing this excellent and valuable study and very kindly offering it to others via Aviation of Japan. 

Image credit: Profile © 2013 Hasegawa Corp; Sample Page © 2021 Ryan Toews

Saturday, 20 February 2016

Jan Voorbij's 1/72 Aichi D3A1 'Val'


Jan Voorbij from the Netherlands has very kindly shared these images and build report of his delightful Aichi D3A1 'Val' model in 1/72nd scale.  The model was built from the latest release of the venerable 51 year old Airfix kit. Aviation of Japan readers will know that this kit, so often maligned elsewhere, is always welcome here. I can remember when it first appeared too, and how much appreciated it was in an era when so few kits of Japanese aircraft were available. "Eye-key Dai-Val' we called it then, in our ignorance. It is rightly a classic, to be built and enjoyed without qualms.


Aichi D3A1 Type 99 Model 11 ('Val')
Imperial Japanese Navy, Carrier Division 1, Carrier Kaga
December 1942 - March 1942
Crew: F1c Shinsaku Yamakawa (pilot) and F1C Katuzo Nakata (gunner, radio operator)

"I first built this kit when I was a 12 year old youngster, attracted by the box art, and revisited it now, at the age of 62 - how times flies. . . It was originally released in 1965 and this one is a rebox from 2011 with new, very good decals. I chose it this time for a project that I had started about the air war over the Dutch East Indies in early 1942. 


"F1/c Yamakawa’s Type 99 is seen here in standard Kaga markings and early war finish. This aircraft was a presentation machine as shown by the inscription on the rear fuselage superimposed over the twin red stripes. This reads 'Hokoku  522 (Dai55 Zen Nippon G)' denoting that it was the 522nd aircraft presented to the IJN and the 55th machine purchased by nationwide subscription. In this particular case the aeroplane was purchased by student donations from girls’ schools throughout Japan.


"Yamakawa flew this aircraft from Pearl Harbor through to the anti-shipping sweep south of Java in March 1942. All presentation weapons, including aircraft, for the IJN were referred to as hokoku, (Ed: 報國) while those for the Imperial Army were called aikoku (Ed: 愛国). Both terms may be translated as ‘patriot’or ‘patriotism’, although the literal translation for hokoku is ‘service to country’, while aikoku is ‘love of country’. Yamakawa’s dive-bomber also sports a different style of flash marking seen on the wheel covers of some Kaga  aeroplanes, with the upper and lower edges converging in a straight line instead of a curve. The difference between the two styles probably reflects separate maintenance buntai assignments for the aircraft. Finally, note the white stencilling block on the side of the engine cowling. This served as a handily placed checklist for Type 99 engine maintenance personnel.  


"I decided to experiment with a different approach: instead of building the kit according to the instructions I wanted it to show that it was a carrier borne aircraft with its wing tips folded. This took a lot of precise measuring and sawing; a tricky job indeed. The Hinomaru decals had to be cut in two, as they were positioned across the fold. I used reference pics to imitate the construction of the wingtips and how they were attached to the wings showing some tubes (bars?) in the mechanism that moved them up or down. A problem that I could not solve to my satisfaction was the canopies. I wanted to display them open, so that the personnel and the scratched interior would be visible. For the gunner's position this meant that the rear parts of the canopy should be placed on top of each other. However, like most of the 1960s Airfix kits, the transparencies are too thickly moulded so this was nor feasible. Therefore I decided to leave the rear part off as it isn't noticed if one doesn't look too closely ;-)


"The kit went well together and there was not much putty needed to fill the gaps. I added two small bombs from the spares box to the wings. For the overall paintjob I decided to choose Tamya XF-76 IJN Grey Green (instead of Humbrol 90 Beige Green the Airfix recommendation). To add weathering I used a dark grey wash and conté pencils. A HB pencil was used to lighten up the rivets.
 

"There is one other omission - there are no small decals with the number '256' that should be displayed on the front of the wheel spats. All in all, despite some shortcomings, this is a kit I would like to recommend and I very much enjoyed building it."
 
Jan Voorbij
 
References:

Tagaya Osamu, 'Aichi 99 Kanbaku 'Val' Units 1937-42 (Osprey Publishing 2011)
Francilion René J, 'Imperial Japanese Navy  Bombers of World War Two' (Hylton Lacy Publishers Ltd 1969)

With special thanks to Jan for sharing the images of his model and build report here. Incidentally, the subject of Jan's model is featured as Profile 9, painted by Jim Laurier, in Osamu Tagaya's superb Osprey book on Kanbaku units.

Image credits: All © 2016 Jan Voorbij